Showing posts with label quilt. Show all posts

Sunday, July 19, 2009

I'm Not Dead Yet!

A friend of mine gently chided me today for no longer posting to my blog. And well, things have changed recently that leave me a bit less time for blogging. That is, I've gone back to having a day job as a product manager after being on leave of absence for a year and a half. It's kind of a night and early morning job too, since I live in California and the development team is in India and Orlando. I've already been on two conference call meetings that started at 5am, and one that ended just before midnight!

It's also summer, and that means I have another job too: chauffeur. My kids go to a plethora of day camps, where they are doing all sorts of fun things like building go-karts, studying and mimicking Egyptian art, creating claymation animated movies (short ones), face painting, and all sorts of other things that are making me hideously jealous as I drop them off and head for the office!

I'm not done creating, though, and I'm not done blogging. I've been doing lots of tie-dye lately with lots of people (including this year's first grade class!), and I never did blog about all of the shoes I've made so far (and now I'm going back and modifying one pair where I just didn't like the way it came out).

As for blogging, I actually have about ten blog posts partially written and waiting for me to upload just the right photos (with and without dog) and add just the right links and tags. I've gotten to the point where I start a draft post in the middle of the night if something comes to me that I just have to write about. I'm having a hard time keeping up with my inspirations, though, both in crafts and in blogs. I still have a tie-dye wedding present to make, several months after the wedding (I'm allowed a year after the wedding! Really! But it's slipping away...). But I'll get to it, someday. And a leather-wrapped coffee mug... but hey, I did finish that quilt, finally!

But for now, since I don't have any late-night meetings scheduled, I'd better finish this off and head for bed. And since I know I'll hear about it if I don't, here are a few pictures. With and without dog.

Official Gratuitous Dog Picture

Here she is, just being her cute self.


Other Recent Stuff

Somebody liked my daughter's discharged jeans so well, she wanted a pair just like them. Several months later, I finally got around to it. My daughter did that tie-dyed shirt herself.


Here I am at this year's Maker Faire, in one of my favorite tie-dyed shirts (funny how the ones I like the best are some of the earliest ones I made). I was trying to complete a circuit and light the lightbulb using nuts and nails to go across the tube in the middle of the board. I succeeded, and they said they hadn't seen anyone do it that way before. I must be nuts...


And here is the result of the 6th Annual First Grade Tie-dye Project! I'm so proud! Even better, the Mountain View Voice published my picture of them (that's about a hundred kids) on page 6.


And now, off to bed!

Friday, June 12, 2009

Look! It's a Quilt!

If Abercrombie and Fitch were to sell quilts, this would be it. It's ratty and frayed. It has the dusky patina of ground-in dirt. It's irregular and uneven. Maybe it's not ripped up enough to meet those trendy A&F standards, but one has to draw the line somewhere.

The jeans circle quilt is done. Well, at least for now. Until I decide to do more stuff to it. But for now, done. Oddly, having it finished seems pretty anticlimactic. It's probably because I don't really have a place or a use for it, since I really just did it for the challenge of it. It took me so long to make (just over a year of on-again, off-again work), and so much physical effort, that I feel I have to hang onto it until I find the right place for it.


The Stats

The "Quilt from Hell", as I'd taken to calling it, has 221 jeans circles (from roughly 30 pairs of recycled adult jeans) and 221 ~5-inch squares cut from a tie-dyed recycled sheet (as well as 442 squares of polyester batting). It weighs 8 pounds according to my scale, but it feels like more.


I had made it up into three long sections, and then put the three sections together. That was one of the reasons making the quilt was so difficult; I had to physically muscle those huge and heavy sections around and through my regular home sewing machine (a Husqvarna Viking Emerald 118). In hindsight, I would have made nine smaller sections and put those together at the end.


It's Unique

The quilt is definitely unique. Besides the randomness of the recycled jeans circles in various shades, which are then laid out in a specific design, I also had the tie-dyed sheet. I had dyed it in a chevron pattern, then cut it all up and rearranged all the pieces. Someone I know wonders why people would take perfectly good fabric, cut it up, and sew it back together again. I just tell her to think of it as making paint from minerals and then smearing it on canvas--it's art. And in this case, it's taking something that isn't perfectly good (the worn out jeans) and putting them to good use.

Extra Special Style

My quilt has something that no Abercrombie and Fitch quilt would have: dog hair incorporated into its deepest recesses. Lacey thinks that's just perfect.


P.S.: I've managed to achieve my New Year's resolution! This may be a first!

Sunday, May 17, 2009

Seat of the Pants

I'm not all that fussy about appearances, and my house is furnished in "Early American Hand-Me-Down, Kids-and-Hobbies". However, I had to do something about the dining room chairs when their covers started ripping from long wear. The table-and-chairs set was left to us by an old housemate when he moved out, and he had bought them at a garage sale before that. They are perfect for our casual lifestyle of feet on the furniture, food spilling, painting, leather working and sewing at the kitchen table. So they were already ugly, but the rips made them uncomfortable too.


In keeping with my waste-not-want-not leanings, and because my friends are still giving me their worn-out jeans (Yay! Keep it up!), the perfect material was obvious: recycled denim! I had also recently bought a book at a silent auction, "The New Sampler Quilt" by Diana Leone, and making sampler blocks for the chair covers seemed like a project I might be able to finish in a reasonable time (where "reasonable" is defined as "less time than the still-unfinished Jeans Circle Quilt from Hell").

The Jeans

For my six chairs, I used the legs of 10 pairs of adult jeans. Four pairs of varying colors (black, dark blue, medium blue, light blue) went to form the quilt blocks. Then I used one pair of legs for the surrounding sections on each chair.

The jeans pocket sections went to the middle school for a group making bags for a school project.

Finding the Grain

Quilt tops work better if the pieces are cut on the grain of the fabric. The grain of reused jeans isn't always obvious because of the diagonal pattern of the denim weave, so I found the grain by pulling off thread after thread (fraying the denim) until I had a straight edge I could work from. Fortunately I had plenty of excess on the jeans legs.


The Squares

Each chair has a different classic quilt square design. I did Wheel, Spools, Ohio Star, Monkey Wrench, King's X, and Card Trick (the hands-down favorite of the household--it's the one behind the dog).


I made templates from the patterns in the sampler book, traced with kids' washable markers and cut them out, and machine pieced them following the instructions in the book.

Once the squares were pieced, I sewed on the fabric from a pair of legs around the square to make the background. I washed the covers after that to get rid of the washable marker.


Quilting

I used batting left over from a previous project. For the quilt backing, I reused six small flannel receiving blankets (complete with Pooh or teddy bear pictures!) that I had left from when my two kids were newborn babies. This would never be visible, but it wouldn't hurt to have something sturdy but soft wrapped around the padding and the wooden seat bases.


I machine quilted the three layers "in the ditch" along the seam lines between the square design pieces so the sewing wouldn't be very visible.


House of Foam

Padding matters. I got a couple of different "chair-sized" pieces of padding at the local fabric/crafts store. These were two inches thick. One was Airtex High Density Foam. The other was Poly-Fil NU-Foam, which is a compressed polyester fiber pad. Unfortunately they were too small for my chairs, but my family sat on them for a week or so to try them out. I found they were too thick to fit well under the backs of the chairs, but they weren't firm enough. When we sat on them, we'd go right down to the wood surface beneath.

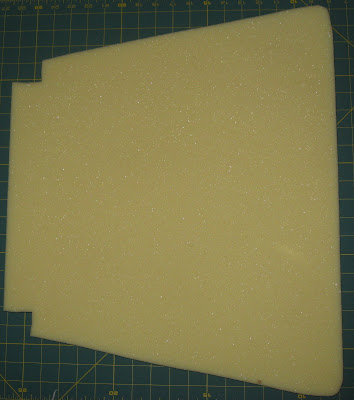
I went to a place called House of Foam in Palo Alto, CA. The proprietor suggested 1" thick high resilience (HR) foam, which he said is the usual one he sells for dining room chairs. It cost about $12 per chair (just slightly more than the same amount of the other padding types would have cost), but as his website says, "Generally the firmer the foam, the longer its firmness will last, and the more expensive it is." However, what I got from House of Foam was definitely the right stuff. They even cut it to shape and glued it onto the the chair seats for me while I ate lunch across the street, making it well worth it for me to go to such a specialty shop.


Putting It Together

I cut off the excess from the quilted covers, then I sprayed the covers with a coat of Scotchgard in the (probably vain) hope that the covers would stay cleaner longer. I used a staple gun to attach the cover over the foam and around to the bottom of the wooden seat pieces. Each seat was then attached to the chair legs and back with four screws, so that part was easy.


Here is the finished set of chairs.


New Beginning and the End

Interestingly, when I removed the previous covers from the wood, I found that these chairs had been recovered at least twice before (old staples and tacks, shreds of two other fabrics). It feels kind of nice to be carrying on a tradition of reuse, and not just throwing something away because it was old. I did, however, grit my teeth and throw out the old cotton padding and fabric covers. They had done their share of service.

Gratuitous Dog Pictures

I managed to sneak in one or two blog entries without dog pictures, but this entry required a lot of pictures, and Lacey now comes running if she even hears the camera turn on.

She's a big help!


She looks like this chair is made for her.


After all, since I have to let my kids sit on these chairs, why not the dog? The kids are often messier!

Tuesday, March 10, 2009

Remodel, Reuse, Recycle

Just a quick "reuse, recycle" note.

When I was doing the remodeling project at my rental house, I hated to throw away anything that might be usable again later. Yep, "Packrat" is my middle name.

One thing that got kept was a hollow door that was no longer needed. It got replaced by a wall. Not in perfect condition, and has a small chunk cut out of one side of it (it was a pocket door), but it is pretty clean and flat.

As I mentioned before, I have been working to make my craft room more usable for the many projects I always have going. The door is just small enough to fit in the room, so I got a couple of Vika Artur trestles from IKEA. I had a couple strips of leftover foam flooring, which I put on top of the trestles to help absorb vibration (I hope).


Well, flat surface in my house never stays bare for long, and this didn't even stay bare long enough for me to get a picture! But the door is under there, valiantly serving as a workbench table top, covered partly by a reused drycleaners' bag to protect it from the contact cement I'm using on my sandals.

And since I'm now buying contact cement by the gallon, I'm storing smaller quantities of it in a jar that once held Procion dye powder from Dharma (the black jar in the middle of the following picture). Gotta use them for something!


Another Recycling Note

I have been working on my jeans circle quilt a little bit at a time. At this point it is in three big pieces (safety-pinned together in these pictures), and I have sewn down most of the tie-dyed squares and batting. I have about 21 squares to go (out of 221) before I can sew the three pieces together, but now I need to stop and figure out which square fits where, since several have fallen out somewhere along the way. Good thing I have a few extras.

This is the first time I've laid the whole thing out since I started sewing down the squares, and it's huge! That's my whole seats-eight-comfortably dining room table underneath the quilt, with the two table leaves pulled a bit apart for extra length and the chair backs supporting the extra width. It didn't look quite so big upstairs on the floor of the kids' playroom.


I imagine it would go more quickly if I didn't have to clear everything off the dining room table to work on it.

Someday I'll finish this...

Monday, January 12, 2009

Another Year of Creativity

It's my first post of the Year 2009, and also an anniversary of sorts, so maybe it's time to reflect a little. Don't worry, it won't hurt...

It has been just over a year since I started a leave of absence from my unusually-long high-tech career at Oracle. I've been there since January 15, 1989 (wow, 20 years ago), and I just needed a (long) break.

I've been very busy in the intervening year, and I haven't been a bit bored. Some projects have been very successful, others less so.

Kid Rooms and Craft Room

I spent quite a while rearranging the contents of several rooms in my house so that my two daughters could each have their own bedrooms. My older daughter got the "new" room with a new loft bed and desk combo so she could study uninterrupted by her darling sibling, and my younger daughter got a new desk in her room and free run of both bunks in the existing bed set. Meanwhile, I would take the contents of my two old craft/storage rooms and combine them into one carefully-planned ultra-functional hobby workroom with built-in shelves and workbench (the Broder line from IKEA).

Eight months or so later, the verdict is decidedly mixed. The girls like having their own rooms, but I'm not having much luck getting them to go do their homework there. They'd rather be working with me or their dad at the kitchen table or sprawled across the living room. In fact, if my older daughter disappears into her room, it's usually because she's hiding in there reading her latest non-homework-related book, and I have to go pry it away from her!

As for my sleek new craft room? The Broder shelving on one side is stunning, and no earthquake is knocking it down without bringing down the walls too! I installed lots of other shelves, cabinets, and drawer units as well. But I haven't been able to get past those basic little laws of physics: I really can't get the contents of two full rooms to all fit in the space of one! Not only is that new room FULL, but so are the hallways and other spaces around the house that were meant to serve as staging areas while I moved stuff around. On the good side, we're all getting very good at sliding sideways through the hallways! In the meantime, my stuff has expanded as I've picked up more hobbies...

The Blog

I started this blog just about a year ago as part of my leave-of-absence plans. Since then, I've written about 50 entries (almost one a week) in this blog, plus quite a few entries in my blog on Turkey (I keep meaning to get back and write more about that!) and my random-topic blog.

Writing has been a major part of my Oracle career over the years, and one of my Oracle colleagues noted with amusement that "a writer just has to write" (or something like that) when he heard about my non-work blogging (yes, I even did a little blogging for Oracle some time ago).

I've been using my blog partly as a way to ramble on without boring people around me to tears. "Mom, haven't you talked about recycling blue jeans enough for today?" The nice thing about blog articles is that if they bore you, you can skip to the next one! It's harder to tell your darling wife or best friend that you really don't care all that much about discharge dyeing, and would she please hush up for a while?

The blog is certainly useful as a reference work, both for me and others. If somebody wants to know how I did some project with the elementary school or the middle school, I can give them the URL, and they can come back to me if they have further questions. It helps both sides. For me, it serves as a reminder of how I did something before. It's useful to have a place to "dump my brain" so I don't have to worry about remembering details in my head a couple years later.

I hadn't expected that my dog Lacey would be such an important part of my blog. She's a smart little dog, though, and it didn't take her long to figure that when the camera came out, posing cutely was a good way of getting attention and treats! Yes, yes, you'll get your Lacey pictures at the end of this article...

The Rental House Remodeling Project

I spent pretty much all Summer and Fall remodeling my rental house (with the help of a really good contractor) for my father-in-law. I was pretty happy with how that project came out, including the fireplace cover.

The Jeans Circle Quilt from Some-Very-Warm-Place-Far-Below-My-Feet

I've written about the jeans circle quilt multiple times already, and it looks like I will have to write updates about it a couple more times before it's finished. I'm still working on it, but I stab myself with all those pins so frequently that it provides pretty strong negative reinforcement! I tend to let my fingers heal before I try tackling it again. It's also so big that it takes a lot of physical effort to muscle it through the machine. It's in three long pieces (queen sized), but if I ever do one of these again I'd do it in much smaller blocks.

I don't usually make New Year's resolutions, but I am making one this year: I will finish my jeans circle quilt (at least by the end of 2010). Sometimes it's all in how you word them.

Tie-Dye

Interestingly, I haven't done much tie-dye of my own lately, though I've helped hundreds of other people do tie-dye over the year, and I expect to keep doing that. Beyond individual projects like the couch and the silk scarf dress, there are really only so many tie-dyed t-shirts, socks and such that one family can wear! I'm not into serious production so much as I'm into experimentation, so selling at craft fairs or similar isn't really of interest. Etsy and eBay aren't really good outlets for tie-dye, though perhaps I didn't try hard enough to build a market there.

I was really excited to get my own page on the Featured Artists section of Dharma's website several months ago. That section is a terrific source to both give and receive inspiration for what one can do with textiles and color!

Teaching and running tie-dye events have been great, though. I did tie-dye at an elementary school and a middle school, two summer camps and family camp, some small parties and some private lessons, and a corporate activity for a group at Google. I already have plans for more events this coming year.

Leather Is the Latest Hobby

I wrote recently that I've started doing leather tooling. Besides collecting a multitude of tools and supplies that are joining the tie-dye stuff spilling out of the craft room, I've been making belts since my last post. I'm now working on my third belt (I'll write up the belts when I finish the current belt). My kids are enjoying doing this hobby with me, and my older daughter especially is getting quite good at it. "Quality Time With Family" is a good justification for an expensive new hobby, right?

Lacey Resolves to Keep Appearing in My Blog

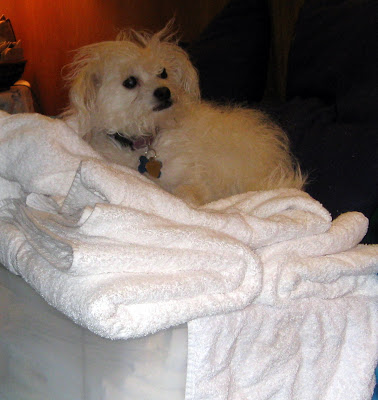
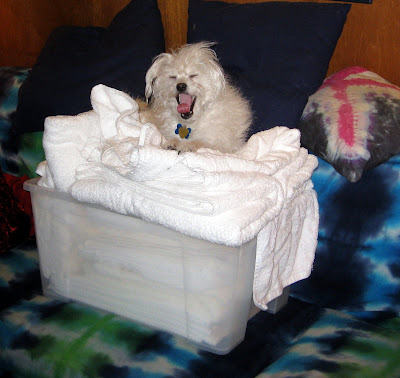
Lacey is cute, and she knows it. It's her key to survival, since she gets places she shouldn't and sheds on everything! I'm currently trying to sort all of my white stuff for tie-dye since I'm back to trying to fit everything in my craft room. I made the mistake of putting a big bin of soft, fluffy, clean white towels (that I'm intending to tie-dye eventually) on the couch. I later found her nestled in right on top!


Aaaah, very comfy. She's quite a princess. I wonder if she would notice if I put a pea underneath some of those layers of towels?


"Don't even think about it!"


"Do I really have to get up?"


Oh well, I'll have to wash the towels again anyhow after I dye them.


"Happy New Year, and May It Be Full of Treats!"

Sunday, October 12, 2008

Ooh, That Waxy Buildup!

I'm still preparing for my class for middle school kids. I usually sign up to do these things if it's something that I'll learn from, as well as something my students will learn from. In this case, I've designed the class intentionally so that I'll teach the kids some things I've never done myself! It forces me to try new things and gives me inspiration. The discharge dyeing was one of those crafts I'd never done before, but I'm planning to teach it, so I had to try it out (I still have more experimenting with that to do, too!).

The next topic for the class is batik. That's on purpose. When I first got the dyeing bug five years ago, thanks to my daughter's 6th birthday party, I went a little crazy with exploring the color-on-fabric medium and Dharma's catalog full of textile arts goodies. Among other things, I got a pound of batik wax and some tjanting tools for applying the wax, planning to try out doing batik. Five years later, the stuff was still sitting unopened in a drawer, so drastic measures were required, such as teaching it to kids!

I found a lot of information on batik on the web. For example, Paula Burch has an excellent discussion on batik on her extensive hand dyeing website. I also have a book called "Tie Dye To Die For & Batik You Can't Resist!" with good information, among others.

Getting Started

I melted the batik wax in its foil tin inside an old (that is, sacrificed to the cause) frying pan that was full of boiling water. I kept the stove burner on a low setting, but I found that the water had to be at a bubbling boil for the wax to get hot enough. If the wax is too cool, it beads up on the surface of the fabric. It has to penetrate the fabric thoroughly to resist the dyes properly.

Using the tjanting really takes some practice. I was just making a sampler on a bandana, not a work of art, so it didn't matter much if I got drips all over, but if I were to get serious about batik I'd need to work on my tjanting skills--for about a year! The hard part is to tilt the tool up just enough to stop its dripping from the tip, but not so much that the wax dribbles out the filling hole on the top and runs down your arm. Yikes.

Here is my pan of boiling water. The batik wax is on the left with the tjanting in it. Notice the frothy, bubbly water in the frying pan--that's what it looks like with lots of wax dripped into it by a tjanting amateur. "Bubbling like a witch's brew in a cauldron" would be a good way to describe what I found to be the right temperature.


I taped my bandana taut to a jelly roll pan (that's a cookie sheet with 1-inch high sides) so my working area would not touch the metal (a handy version of a silk painter's frame). That was useful because I don't have many empty flat surfaces in my house, so I could just stack this on top of everything else to be near the stove (works better than just dumping everything else on the floor!). I did have to keep shifting and re-taping the bandana to get at all of the bandana's area, though.


Here is my bandana with the wax applied. In the lower right corner I tried using a metal cookie cutter to apply the wax. That's supposed to be a frog. Near that is a big dark area where I painted wax on with a paintbrush between lines I had already done with the tjanting. I wanted to have a big area to test out the crackle effect.


I wadded up the corner of the bandana to crack that big area of wax and the surrounding areas (though all of the wax got somewhat cracked due to my generally-rough handling).


Other Resists

Because getting rid of the wax is such a pain, many people have tried out using other resists instead of the wax. They have various limitations, though, such as not producing the characteristic cracked effect found in real batik. At some point, while I was making glycerin soaps with my kids, it occurred to me that the soap itself might make a good resist that could then just wash right out at the end. The melting temperature and viscosity is similar to that of wax.

I melted some of the glycerin soap in the same frying pan full of water with my batik wax. That's the small handled pot in the picture above. I applied the soap to the upper right corner of my bandana with a second tjanting.
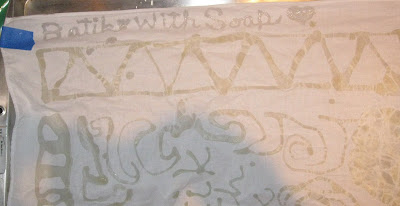

The glycerin soap is shinier and less yellow than the wax.

Dyeing

I used direct application for the dyes--I'm a big fan of immediate gratification! I gently soaked the bandana in a small bucket of soda ash solution, separate from my usual soaking bucket, because I didn't want to contaminate all my mixed-up soda ash solution with the water-soluble soap. Then I painted or squirted on dyes that I had around from recent tie-dyeing (same Procion dyes anyhow). One advantage of batik direct application is that I used less dye than I would have to tie-dye the same bandana. I let it sit overnight.


Resisting Resists

Next came the not-so-fun part, removing the resists. The soap, as expected, came right out in the cold-water rinse I always do for tie-dyes (to remove the soda ash and the worst of the excess dye). Then I tried various things to get rid of the wax. I tried bending it to remove the big chunks and drips. That helped a little. Scraping with a dull table knife was hopeless.

Then I tried boiling in water. Unfortunately I didn't have a multi-gallon pot (as Paula suggests) that I was willing to sacrifice to the cause. The wax and the soap might be food-safe, but there is still a lot of excess dye in the bandana. The pot I used was small, and the water immediately became dark blue with excess dye (and the bandana stuck out of the water in places, too). So if I wanted to change the water multiple times rather than boil blue dye onto my nice white batik lines, I had to do something about the wax. It was a mess. I scraped some off with a cold spoon, which helped some but was ridiculously tedious. I tried a fine strainer, which simply clogged. I tried paper towels in a coarse strainer, and the water poured past the paper towel (not held in well enough). I hate to think how much wax is now clogging my kitchen pipes!

I finally had done enough rinsing and wax removal that I wasn't concerned with dye redepositing. I went out to the garden, got a few rocks, and plopped them in to boil with my bandana and hold it down under the surface. I then let the water cool, and I scraped enough wax off the surface to get my bandana out.

I hand-washed the bandana with Synthrapol, let it dry, and here it is.


Since I was just making a sampler, I didn't worry about the age of the mixed dyes, so they look a bit more faded than an experienced Procion dyer would expect. The purple especially didn't hold its color--it was the oldest mixed dye. I've found that greens particularly, then purples and blues, lose their color strength the fastest (the New Emerald Green here was fresh). I've learned to make up fresh batches of dyes when I'm doing something where the color and brightness is important.

Here's the corner where I used the soap as the resist. Soap didn't get the really sharp, crisp edges wax gets, but it does get some cracking. I think it would have been helpful to have the soap a little hotter than the wax, though, so it could have penetrated a little better.


For my class, given that we won't have much time and there is very little budget, I'll show my students the difference between the wax and the soap, and then we'll use the soap. The soap has the advantage that it's easy to get in any craft store, and they can melt it using a microwave (repeatedly, but it does work). Then they can take their work home to wash it, and I won't have to worry about their parents calling me to complain about clogged drains!

And in my case, I still have a lot of wax to clean off the stove, the oven below it, the floor, the sink, the pans... I'd hate to lose my crafts-in-the-kitchen privileges. I'm getting close to that, though, since I still have my sewing machine on the kitchen table while I work sporadically on that jeans circle quilt. Eeek!

Dang Dog!

My little publicity hound somehow sensed I was going to take blog pictures tonight. I had just laid the white sheet and the bandana down on the floor and had gone into the other room to get my camera. In that short time, she went and found a squeaky toy and started cavorting with it in the middle of my photo setup!


My daughter tried to help distract Lacey while I set up again (but Lacey had no intention of letting go of the toy).


She only gets away with it because she's cute...


I'm thinking next time maybe I should batik the dog. But I'll have to use the soap instead of the wax. Wouldn't want any waxy buildup on that fluffy white fur!