It's amazing how sometimes many disparate influences come together.
Colonial DaysWay back in March or April, my daughter's fifth grade class studied American colonial times. The teachers and parents put together an elaborate simulation of "Colonial Williamsburg", complete with tavern, church, government, leatherworking (cobbler), butter-making, and so on.
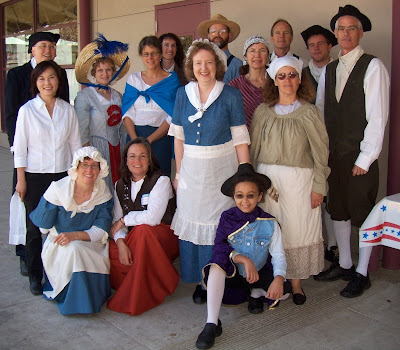
My part was the leatherworking activity, and of course I chose that one because I had never done leatherworking before! Arranging and participating in the activity was my first try at leatherworking. Fortunately I had lots of excellent help from Andy Stasiak of the local
Tandy Leather Factory store--he even taught the kids himself! The kids loved the skunk skin he brought (though most of them wouldn't touch it).

A whole class of kids whacking leather!

That was a
really noisy classroom! It was fun, though, and I learned that the mysterious toolset my dad had given me some time before was actually a pretty complete leatherworking set. I didn't do much with it at that point, though, other than play with it a bit.
Mexico and ChinaIn Mexico and other Spanish-speaking countries, there is a craft called "papel picado", or "punched paper". Papel picado is created by using punch tools to make designs in multiple layers of brightly colored tissue paper. A few months ago, I was looking at paper picado designs with the goal of replicating them (somewhat) in my tie-dye. While I never managed to get exactly the results I wanted, I learned about another art form, and I did make a couple of fun tie-dyed banners.
Later, when I was
visiting Japantown with the middle-schoolers, I bought some books. Besides books on shibori, I bought a book called
"Cutting Paper Work of China". Well, it was probably called something else, but it was in Japanese, as was almost all of the text. What little English text there was (on the dust jacket) said that the book covered a folk art called "senshi". Senshi was/is practiced by housewives in China who cut paper into intricate designs of animals, flowers, and so on using scissors and small knives. Many of the designs and motifs struck me as being similar to papel picado, and the designs are fascinating in their own right.
Forward to Today...
All these things come together in my planning to make myself a tooled leather belt to replace yet another flimsy belt that is falling apart (and threatening to let me and my jeans down). Being the perfectionist I am, I want my (first) belt to be perfect, so I started practicing my leatherwork skills on something smaller: keychains/backpack tags/Christmas ornaments.
The first ones were pretty simple. I simply did individual capital letters with a border. I got lettering inspiration from another book,
"The Art of Creative Lettering" by Becky Higgins, that I had handy from my scrapbooking days years ago.

Later, I started to branch out into birds and animals. Papel picado and my Chinese paper cutting book gave me ideas (such as the adapted bird on the branch, below), and I browsed the Internet for pictures of kittens and other creatures. I found pictures of peacocks in their full glory at
http://www.peafowl.org (I had no idea there were so many types of peafowl!). The flower design in the upper right corner came from a Tandy pattern.
 Tooling the Leather
There is a specific sequence for a lot of decorative leather tooling. First, you draw the pattern on paper, then dampen the leather (called "casing the leather") and trace the lines with a stylus (kind of like a ball-point pen with no ink). That gives the design on the leather like this kitten below (the lighter lines are where I used the stylus directly on the leather instead of through the paper).

You cut along the lines using a special leather cutting swivel knife (right, below). Beveling along the cut edge with a beveling tool (left, below) and a mallet gives the picture definition (see above and below the paws, and in the ears for beveling).

I used various stamping tools to refine the picture, adding stars to the pillow, and so on.

I used the knife again to make little cuts for the whiskers at the very end.
How About Some Color?I also added color to several pieces. I used Tandy's
Eco-Flo All-in-One finishes to both color and protect the pieces. In the picture below, I colored all four. The J, A, and M are all using the same Mariner Blue color, but I have rubbed the M with a piece of an old cotton dishtowel to make it shiny.

For the A in the following picture, I have rubbed the left side only. The All-in-One works really well--it only takes about 4-6 strokes with the cloth to get the leather shiny! I do more strokes to get the piece as shiny as possible all over.

For scale, the leather pieces I'm using are all about 2.5 inches tall.
Here are some pieces that I painted more elaborately with various colors of the All-in-One.

Diluting the paints gives a whole new range of possibilities.
 Ooh, Ooh, Me Too!
My kids decided the leatherwork looked like to much fun to let me do it undisturbed. They jumped right in, putting their own spin on letters and other designs. My younger daughter found a dolphin design in a coloring book, and adapted it with her own ideas. She did two of those plus several others.


My older daughter did both pictorial pieces and geometric pattern pieces, though she wasn't interested in painting them:

We even had a couple of my older daughter's friends over to do some. They had a blast (and I thought the ringing in my ears would never go away!).
Gratuitous Dog PicturesLacey didn't get much chance to help out on these little projects, but I thought she could model some of them.

I think maybe it's just a bit overmuch on the bling, dahling!
 To Be Continued at Some Point...
I'm having so much fun with my little keychains that it will probably take me a while to get around to doing the belt I'm planning (and there is still that
jeans circle quilt languishing on the sewing machine). It's just so much fun to create all these little miniature works of art!


