Showing posts with label wax. Show all posts

Wednesday, May 13, 2009

Shoe Mania, Part 4: They're Multiplying!

I was so pleased and excited by the results of my first pair of sandals that I immediately started on three more pairs. I had another design that I wanted to make for myself, and of course both of my daughters wanted some too.

Younger Daughter's Pair: Fancy Thong Sandals with Horse Head Conchos

My younger daughter flipped through the "Sandal Making" book and selected a thong style. Of course she wanted a small modification to the style to make it just what she wanted. She wanted a horse head decoration in the middle of the shoe. Tandy had some matched right- and left-facing horse head conchos that were just the thing.

I cut out the bottom soles and heels for her shoes. Her shoe size is about a kids' size 2, and it took about a square foot of saddle skirting leather.


It's easy to make a long oblong slot for a wide strap even if you don't have a big enough punch. Simply punch a second (or third) time, overlapping the ends of the hole, as in the following picture.


The colors and dyeing process were pretty similar to what I did with my first pair. With her pair, however, she wanted the sole to be black. No problem. After dyeing, I cleaned the pieces with Lexol and treated them with carnauba creme (wax). Since I was going to be gluing the straps to the soles, I didn't treat the whole pieces with the wax. I used the tape to show where I didn't need wax.


Fitting her shoes took repeated efforts, since I had to align the toe straps with the conchos and the riveting and make it fit around her foot properly. I did a fair amount of skiving on both the soles and the strap ends for her shoes so she wouldn't have huge lumps where the double layer of straps went under her (lack of) arch (I marked the skived areas with chalk in the picture below). I didn't bother with padding.


For my first pair I had used nails to reinforce the connections between the straps and the soles after I had glued them with Tandy's contact cement. For this new pair, I used rivets and cement. I also skived the straps, shaving off some of the blue and green dyed layers, so they wouldn't have such noticeable edges under the foot.


Next, I glued on the sole, avoiding putting cement on the back strap, which is supposed to slide.


For this pair of sandals, I wanted to try stitching around the edges of the sandals instead of nailing on the sole. The stitching gives a neater, more finished look to the sandals. The first step is to mark a dotted line of dents using an overstitcher that gives 5 stitches per inch.


I then used a Number 51 drill bit (just smaller than 1/16th of an inch) to drill holes through the soles. I was using a hand-held corded drill. It took 40 minutes for me to drill all around the two child-sized sandals, and my hands and arms were aching by the time I finished. Unfortunately, it was hard to drill straight down through the soles, so the bottom line of holes (and the resulting stitch line) wavered quite a bit. I drilled right through the heels as well.


We used two-needle stitching (my daughters both did some). I found helpful information on this on the web, particularly on the Back Room Leather website. I used waxed nylon sewing awl thread from Tandy. The stitching took about three hours.


We tried various methods to smooth the edges of the sole. Here my younger daughter is using sandpaper wrapped around a small block of wood to sand the edges of her sandals. She is using a "lacing pony" to hold the sandal while she works. The sandpaper-around-wood worked, but it was very slow, and it didn't work on parts that curved inward (the arch area). I also used coarse sandpaper cylinders attached to a mandrel on my drill. That worked better.


Once the stitching and trimming steps were done, I dyed the edges black to match the inner sole.

I don't want the shoes to be slippery, and I want to protect the stitching from wear, so I put a layer of SoleTech 3.5 on both the heels and the main part of the soles.

I had learned my lesson from the first pair of sandals, so I cut the SoleTech pieces a bit large and then trimmed them off after gluing the pieces to the sandals.


Here are the finished sandals:


Here is the front view:


I think the horse head conchos were an inspired piece of design on my daughter's part. She gets comments all the time about how cool they are. I hope she doesn't outgrow them in a month, but if she does, I can always make her another pair!

Friday, February 20, 2009

Belting It Out Again

My first two belts were so fun that I immediately had to start the next one. Besides, my kids line up quickly when there are cool goodies to be had, and there was my older daughter, jostling her way to the head of the line! My younger daughter had already made her own belt, so she was sated for the moment.

For the new one I found a chain pattern on a photo of a tile, and I adapted it to fit the 1.5-inch wide belt blank I was using. The first thing I did was dampen the leather and use the edge creaser to mark lines along the belt for the edges, about a quarter-inch in from each side.

Then I dampened the leather some more and traced the pattern, following with the swivel knife. The pattern is really intricate and tedious, so I did each step in small sections to make it more interesting: trace, knife, trace, knife, and so on.

The following picture shows me cutting the pattern with the swivel knife. The idea is that you pull the knife towards you, swiveling it along the traced line with your thumb and third-fifth fingers while your index finger keeps the knife steady.


Here is a picture of the pattern, partly traced and partly cut:

The trick with the swivel knife is that is has to be really well sharpened and polished all the time. Mine wasn't sharp enough--it isn't completely sharp when you buy it, so you have to sharpen it more yourself. If you don't, you get "drag" on the blade as you go along, and the cuts aren't as smooth as they should be. It's hard to see in the picture, but my cut lines are a little jagged.

Here I started tooling the pattern as I went along, mostly with a patterned beveling tool:


As I mentioned in my post on riveting, I often jump straight into a project without doing quite enough practicing or testing first. I did in this case, and found that for my particular pattern I didn't have quite the right beveling or patterning tools to give me exactly the look I wanted. I ended up doing a bit of rework right on the belt as I tried out different tools. Fortunately the rework didn't show much (and perfection is a bad thing, right?).

Here is the tooled belt at the buckle end. The pattern and tooling goes all the way to the other end of the belt (the billet end).


Dyeing to Dye

A big reason for doing this third belt was to try using dyes that were separate from the finish, instead of the Tandy's Eco-Flo All-in-One. This time I was using Tandy's Eco-Flo Leather Dye. Also, for this belt I was doing different colors for the different threads of the chain pattern.

Here you can see how the different colors (Deep Violet, Emerald Green, and Evening Blue) weave together:


Then I added the dark brown background (Dk. Coco Brown):


If I had stopped here, I probably would have been fairly happy with the colors. However, the process recommended by the guys at the shop was to clean off the excess dye using a soft cloth and Lexol leather conditioner. I did that, trying to avoid mixing my several colors (mostly getting my green and purple muddied with brown), and my belt ended up looking very faded:


I then put a second painstaking coat of dyes on the entire belt and cleaned it again with the Lexol. It looked only slightly better than it did in the picture above, but since painting the separate colors was such a pain, I decided it was good enough.

I covered the back of the belt in the dark brown. The Lexol didn't take off as much of the dye from the back (the rough "flesh side" instead of the smooth "skin side").

Here is how it looked after the second coat and cleaning (and hole punching):


Dyeing to Finish

I used Tandy Carnauba Creme as the finish for the belt. It's basically a blend of waxes in a water base. You smooth it on using a soft cloth (I've been using cut-up pieces of a worn out t-shirt). When the creme dries, you buff it with more cloth until the leather shines. When I was applying the creme, I found that quite a bit more dye came off onto the cloth. Just a little more dye comes off during the buffing stage, though (whew!).

I did find that the most finely-textured (stippled) parts of the belt design still showed little white spots of wax after the buffing with cloth. An old soft toothbrush in a gentle circular motion worked for those.

Here is the final belt. Not that I'm keeping score, but this one probably took me 30-40 hours to make (instead of 8 hours each for the blue and brown ones). Carving and tooling the pattern for this belt definitely took longer, but the big timesink came with the careful multiple coats of multiple colors.

In general, I'm not particularly happy with the way the colors came out. The purple looks more like pink, and the whole thing is a little too "distressed"-looking for my tastes. But my daughter cheerfully snatched it up and carted it off before I could change my mind about giving it to her, so I guess it's good by definition!


Solvent Salvation

California, where I live, has imposed a lot of environmental restrictions on volatile organic compounds (VOCs), that is, all the really useful and effective (and harmful) solvents. This means that many manufacturers have had to reformulate dyes, paints, and such to eliminate or lower their use of the "bad" solvents. Tandy's Eco-Flo dyes and other products are the water-based response to lowering the VOCs.

The "old-timers" who hang out and do their leather work together on Saturday mornings at the local Tandy store shake their heads sadly and say that it's just not like the good old days where you could dye your leather and get a good high at the same time. Well, they don't really say that, but the old solvents were very good at carrying dyes deep into the leather, and water, while the ultimate solvent of life, just isn't quite so good for leather dye. They do say the new dyes just don't work quite so well as the old versions. But that's life in California, and clean air is definitely a good cause.

Lacey Investigates


Lacey is pretty diligent about investigating objects left on the kitchen floor. Food? Treats? Toys? Those nasty VOCs?


Nope, no VOC problem here. A few treats would be nice, though...

Wednesday, November 19, 2008

Dye Week at the Middle School

After months of off-and-on preparation work, I finally did my week-long half-day dyeing class for a bunch of middle school girls. We spent the time exploring several different ways of using "resists" with dye to create patterns on fabric. Like any class, it had both successes and failures, but overall, I think it went well, and both the girls and I learned a lot.

Day by Day

Monday we did basic tie-dye patterns such as stripes and spirals and rays, and each girl tie-dyed a white t-shirt. This is the same sort of thing I've been doing with groups for quite a while now, and the individual results mostly varied depending on how carefully they tied and dyed their shirts.

Tuesday we did stitch resist on bandanas. Stitch resist didn't work very well for the class. Most of the girls (grades 6-8) had trouble stitching their designs (on cotton bandanas) and pulling and tying them tightly enough, so the stitching didn't really resist the dye and their designs got lost. On the other hand, a shibori technique of folding and clamping silk hankies with various clips worked very well. Almost all the girls came out with strongly-geometric designs that were really beautiful.

Here is the group with their shibori silk hankies:

What beautiful patterns!


Wednesday we did discharge dyeing (bleaching dark colors to have light-colored patterns). We started with an experiment where we put Soft Scrub with Bleach on many different scraps of fabric to see what effects it would have. We saw that on the all-synthetic socks we got no effect, but that on dark blue fabric we got nearly white patterns. We then did designs on black T-shirts. Since I had gotten black shirts specifically meant for discharge dyeing, and I had run out of prep time beforehand, I hadn't tried one before class. They turned out to work well, bleaching much faster than I had expected, to a nice rust color (they don't bleach to white from the black). Several girls also bleached patterns onto jeans with stencils (I love that part--those jeans are now their own designs, not those of some brand name designer!). This technique was a big hit! One girl liked it so much she did more of it for the rest of the week during any free moments. We also did "regular" tie-dye on tote bags while they were waiting for the Soft Scrub to work.

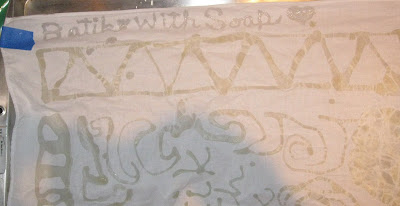
Thursday we did "fake batik" (using glycerin soap instead of wax) on bandanas. The soap batik counts as the main failure for the week. Even though I had been successful with it in my trials at home, the conditions in class made it a lot harder. The main difference was the temperature of the melted soap when the girls tried to apply it to the cloth. At home, I worked right at the stove, and the soap stayed an even high temperature the whole time. At school, I couldn't have the girls working over the portable electric burner I used, so I took the pot to their table once the soap was melted. The soap cooled much too quickly, clogged up the tjanting tools, and hardened before going onto the fabric. Since the soap didn't penetrate the fabric properly, so it didn't resist the dye, and the designs were mostly lost. Wax would have had all the same problems under these working conditions (no heat at the working table). One additional problem with soap, though, is that very thin lines can get washed out in the soda ash soak, and many of the girls' lines were too thin as well.

Friday I gave them each another cotton bandana, and we all folded them into eighths (triangles). I then showed them the marking-pen-and-pleating technique that I first learned from Michael Fowler's Art of Tie-Dye DVD. They dyed their pieces, and then I let the pieces sit about an hour. I rinsed them in cold water enough so we could look at the designs and hang them out to display for the end-of-week assembly. They came out beautifully, with bold geometric patterns. We finished the week with a short but fabulous fashion show at the assembly.


Now That It's Over

I had a lot of help with running this class. One of the moms came in to help for the whole class, and my housemate came in for two days as well (many thanks to both of them!). For a class of nine girls, that ended up being about the right amount of help, so nobody had to wait too long before we could help them The girls did need a fair amount of help, especially with the stitching and the batik, though not as much help as the first graders I usually work with.

If I were to do this class again, I'd do it a bit differently. I'd skip the stitch resist and the batik completely and save those for the adult classes. I'd do more "classic" patterns like crinkle on white shirts and bandanas. One thing I'm glad I did right was to confine the discharge dyeing to using just the Soft Scrub, and not using buckets of bleach in water or spray bottles of bleach and water. I had several pretty high-energy kids in this class, and those could have been a disaster. The Soft Scrub is really easy to deal with from a safety and control perspective.

Budget is always a factor for classes like these. I had a budget of $20/girl for the whole week, or $180 total. Bandanas are good pieces for the class. They cost about $1 each in bulk. I buy them at the same time I buy lots of other stuff, like all the inexpensive white t-shirts (about $2 each) and black t-shirts (about $3 each) . Silk hankies were less than a dollar each and the results were very satisfying; I'd do more of those next time. Tote bags were about $3 each. I spent about $22 on four bottles of Soft Scrub, and most of it got used up! I spent about $1.50 per girl on gloves (they preferred larger reusable latex gloves over the close-fitting disposable nitrile gloves), and the rest was trash bags (for smocks), dye (the largest portion, about $25) and chemicals. I've already got many sets of goggles and most of the infrastructure equipment (squirt bottles and such).

One thing the kids liked, of course, was that there was a lot of stuff to take home with them, and it was even better because they had made the pieces beautiful.

So would I teach this class again? Oh yeah, next chance I get!

Sunday, October 12, 2008

Ooh, That Waxy Buildup!

I'm still preparing for my class for middle school kids. I usually sign up to do these things if it's something that I'll learn from, as well as something my students will learn from. In this case, I've designed the class intentionally so that I'll teach the kids some things I've never done myself! It forces me to try new things and gives me inspiration. The discharge dyeing was one of those crafts I'd never done before, but I'm planning to teach it, so I had to try it out (I still have more experimenting with that to do, too!).

The next topic for the class is batik. That's on purpose. When I first got the dyeing bug five years ago, thanks to my daughter's 6th birthday party, I went a little crazy with exploring the color-on-fabric medium and Dharma's catalog full of textile arts goodies. Among other things, I got a pound of batik wax and some tjanting tools for applying the wax, planning to try out doing batik. Five years later, the stuff was still sitting unopened in a drawer, so drastic measures were required, such as teaching it to kids!

I found a lot of information on batik on the web. For example, Paula Burch has an excellent discussion on batik on her extensive hand dyeing website. I also have a book called "Tie Dye To Die For & Batik You Can't Resist!" with good information, among others.

Getting Started

I melted the batik wax in its foil tin inside an old (that is, sacrificed to the cause) frying pan that was full of boiling water. I kept the stove burner on a low setting, but I found that the water had to be at a bubbling boil for the wax to get hot enough. If the wax is too cool, it beads up on the surface of the fabric. It has to penetrate the fabric thoroughly to resist the dyes properly.

Using the tjanting really takes some practice. I was just making a sampler on a bandana, not a work of art, so it didn't matter much if I got drips all over, but if I were to get serious about batik I'd need to work on my tjanting skills--for about a year! The hard part is to tilt the tool up just enough to stop its dripping from the tip, but not so much that the wax dribbles out the filling hole on the top and runs down your arm. Yikes.

Here is my pan of boiling water. The batik wax is on the left with the tjanting in it. Notice the frothy, bubbly water in the frying pan--that's what it looks like with lots of wax dripped into it by a tjanting amateur. "Bubbling like a witch's brew in a cauldron" would be a good way to describe what I found to be the right temperature.


I taped my bandana taut to a jelly roll pan (that's a cookie sheet with 1-inch high sides) so my working area would not touch the metal (a handy version of a silk painter's frame). That was useful because I don't have many empty flat surfaces in my house, so I could just stack this on top of everything else to be near the stove (works better than just dumping everything else on the floor!). I did have to keep shifting and re-taping the bandana to get at all of the bandana's area, though.


Here is my bandana with the wax applied. In the lower right corner I tried using a metal cookie cutter to apply the wax. That's supposed to be a frog. Near that is a big dark area where I painted wax on with a paintbrush between lines I had already done with the tjanting. I wanted to have a big area to test out the crackle effect.


I wadded up the corner of the bandana to crack that big area of wax and the surrounding areas (though all of the wax got somewhat cracked due to my generally-rough handling).


Other Resists

Because getting rid of the wax is such a pain, many people have tried out using other resists instead of the wax. They have various limitations, though, such as not producing the characteristic cracked effect found in real batik. At some point, while I was making glycerin soaps with my kids, it occurred to me that the soap itself might make a good resist that could then just wash right out at the end. The melting temperature and viscosity is similar to that of wax.

I melted some of the glycerin soap in the same frying pan full of water with my batik wax. That's the small handled pot in the picture above. I applied the soap to the upper right corner of my bandana with a second tjanting.

The glycerin soap is shinier and less yellow than the wax.

Dyeing

I used direct application for the dyes--I'm a big fan of immediate gratification! I gently soaked the bandana in a small bucket of soda ash solution, separate from my usual soaking bucket, because I didn't want to contaminate all my mixed-up soda ash solution with the water-soluble soap. Then I painted or squirted on dyes that I had around from recent tie-dyeing (same Procion dyes anyhow). One advantage of batik direct application is that I used less dye than I would have to tie-dye the same bandana. I let it sit overnight.


Resisting Resists

Next came the not-so-fun part, removing the resists. The soap, as expected, came right out in the cold-water rinse I always do for tie-dyes (to remove the soda ash and the worst of the excess dye). Then I tried various things to get rid of the wax. I tried bending it to remove the big chunks and drips. That helped a little. Scraping with a dull table knife was hopeless.

Then I tried boiling in water. Unfortunately I didn't have a multi-gallon pot (as Paula suggests) that I was willing to sacrifice to the cause. The wax and the soap might be food-safe, but there is still a lot of excess dye in the bandana. The pot I used was small, and the water immediately became dark blue with excess dye (and the bandana stuck out of the water in places, too). So if I wanted to change the water multiple times rather than boil blue dye onto my nice white batik lines, I had to do something about the wax. It was a mess. I scraped some off with a cold spoon, which helped some but was ridiculously tedious. I tried a fine strainer, which simply clogged. I tried paper towels in a coarse strainer, and the water poured past the paper towel (not held in well enough). I hate to think how much wax is now clogging my kitchen pipes!

I finally had done enough rinsing and wax removal that I wasn't concerned with dye redepositing. I went out to the garden, got a few rocks, and plopped them in to boil with my bandana and hold it down under the surface. I then let the water cool, and I scraped enough wax off the surface to get my bandana out.

I hand-washed the bandana with Synthrapol, let it dry, and here it is.


Since I was just making a sampler, I didn't worry about the age of the mixed dyes, so they look a bit more faded than an experienced Procion dyer would expect. The purple especially didn't hold its color--it was the oldest mixed dye. I've found that greens particularly, then purples and blues, lose their color strength the fastest (the New Emerald Green here was fresh). I've learned to make up fresh batches of dyes when I'm doing something where the color and brightness is important.

Here's the corner where I used the soap as the resist. Soap didn't get the really sharp, crisp edges wax gets, but it does get some cracking. I think it would have been helpful to have the soap a little hotter than the wax, though, so it could have penetrated a little better.


For my class, given that we won't have much time and there is very little budget, I'll show my students the difference between the wax and the soap, and then we'll use the soap. The soap has the advantage that it's easy to get in any craft store, and they can melt it using a microwave (repeatedly, but it does work). Then they can take their work home to wash it, and I won't have to worry about their parents calling me to complain about clogged drains!

And in my case, I still have a lot of wax to clean off the stove, the oven below it, the floor, the sink, the pans... I'd hate to lose my crafts-in-the-kitchen privileges. I'm getting close to that, though, since I still have my sewing machine on the kitchen table while I work sporadically on that jeans circle quilt. Eeek!

Dang Dog!

My little publicity hound somehow sensed I was going to take blog pictures tonight. I had just laid the white sheet and the bandana down on the floor and had gone into the other room to get my camera. In that short time, she went and found a squeaky toy and started cavorting with it in the middle of my photo setup!


My daughter tried to help distract Lacey while I set up again (but Lacey had no intention of letting go of the toy).


She only gets away with it because she's cute...


I'm thinking next time maybe I should batik the dog. But I'll have to use the soap instead of the wax. Wouldn't want any waxy buildup on that fluffy white fur!