Showing posts with label kids. Show all posts

Monday, September 28, 2009

Origami Revisited

Recently I wrote about how I was experimenting with origami paper and pushpins to come up with new tie-dye patterns. I had tied one design according to the paper pattern, but I hadn't gotten around to dyeing it yet:


This was the pattern I was (sort of) aiming for:


I finally got around to dyeing the bedsheet I had folded, and here is the result:


I didn't get quite enough dye into all the folds, so there is a bit more white than I would like, but you can see that the pattern actually came out quite a bit like the paper one!

Of course, if I have a tie-dyed top sheet, I need to dye the rest of the sheet set to match. So I folded and tied up the fitted sheet semi-randomly (that is, no particular plan but similar folding techniques), and it came out like this:


Here is the matching pillowcase:


I had a couple hand towels and washcloths handy, so I dyed them too:


One disadvantage of all-cotton sheet sets is that they wrinkle like crazy. Since I'm still practicing my "done is better than perfect" policy, I haven't bothered to iron them. But these pictures get the idea across, and my kids don't care--they've already started arguing over who should get these sheets!

Monday, August 10, 2009

Origami Paper, Tie-dye, and Birthday Parties

I first started doing tie-dye six years ago, when my older daughter wanted a tie-dye theme for her sixth-birthday party. I did some reading, a friend pointed out the Dharma website, I got some supplies, I tried it out a couple of weeks in advance, it came out well, and I was hooked.

Since then I've helped about a thousand people do tie-dye: more than 500 first graders, a couple of Girl Scout troops, several birthday and other parties, my class for middle schoolers, several kids' day camp and family camp sessions, three corporate team-building events, and lots of random sessions with friends. I love doing tie-dye as a hobby, but I'm actually more interested in teaching it to other people. I have no interest in doing it as a production-and-craft-fairs profession--Harmony can do a much better job, and I recognize their distinctive work on people all over town.

I've mentioned before how I like to sneak in a little education when I teach people how to do tie-dye. Math, spatial skills, and so on. They get practice in colors and manual dexterity. And of course I think doing tie-dye is good for the soul, too. No, buying the mass-market tie-dye t-shirts at the local big-box store doesn't count.

Origami (paper folding) and kirigami (paper cutting) are similar crafts that exercise those same mental and physical "muscles". I did lots of origami as a kid, and I loved it. I've also done some kirigami; those paper snowflakes I did in school were just the beginning. True, you don't end up with the same wearable results as with tie-dye (including shibori), but visualizing how the project is going to turn out is half the fun for all three crafts, as is the pleasure (for me) of folding materials precisely.

Lately I've been playing with origami paper as a quick and concrete way to visualize how various folds might come out in tie-dye. The basic paper is cheap, thin, colorful, and easy to fold (I get 60 sheets for $1.50 USD at the local Daiso store). I've been folding it up in various wedges, squares, or rectangles, then piercing it in patterns using a push-pin into a small block of firm packaging foam. I particularly like the foam that feels a little soft and waxy (not Styrofoam/polystyrene), but anything you can easily push a pin into will work fine.


I put the resulting pierced "snowflakes" up on a window so I can see the light pattern through them (dark paper colors work best), and they are very pretty.


My kids joined in, of course, producing some beautiful ones of their own. My younger daughter folded her paper in random directions before piercing it, and she came out with some very intriguing designs.

These paper creations were so easy, so fun, so cheap, and so clean (no cut-out pieces to sweep up!) that I added them to the activities roster for my younger daughter's ninth birthday party (a crafts theme, naturally) a couple weeks ago. It was a definite hit with most of the kids. For the goody bags (party favors), I sent home the foam blocks and push-pins the kids used, along with a fresh packet of origami paper for each child, in hope that they might do some more later and keep flexing those brains.

Now I'm starting to work on translating a few of those paper designs into tie-dye.


I'm using the fold-along-a-drawn-line technique shown in both of my favorite DVDs about tie-dye:
  • "Learn How to Tie Dye: Complete 3 Volume Set" available from Dharma or Amazon
  • "The Art of Tie-Dye" available from Dharma or Amazon


Sometimes I'm stitching the designs with dental floss, sometimes I'm just tying the designs without stitching. The more complex designs need to be stitched so they don't slip apart.

I haven't dyed any of these yet, and they won't come out exactly like the paper patterns, but I'll post them when I do. In the meantime, try out some paper pattern piercing!

Sunday, July 19, 2009

I'm Not Dead Yet!

A friend of mine gently chided me today for no longer posting to my blog. And well, things have changed recently that leave me a bit less time for blogging. That is, I've gone back to having a day job as a product manager after being on leave of absence for a year and a half. It's kind of a night and early morning job too, since I live in California and the development team is in India and Orlando. I've already been on two conference call meetings that started at 5am, and one that ended just before midnight!

It's also summer, and that means I have another job too: chauffeur. My kids go to a plethora of day camps, where they are doing all sorts of fun things like building go-karts, studying and mimicking Egyptian art, creating claymation animated movies (short ones), face painting, and all sorts of other things that are making me hideously jealous as I drop them off and head for the office!

I'm not done creating, though, and I'm not done blogging. I've been doing lots of tie-dye lately with lots of people (including this year's first grade class!), and I never did blog about all of the shoes I've made so far (and now I'm going back and modifying one pair where I just didn't like the way it came out).

As for blogging, I actually have about ten blog posts partially written and waiting for me to upload just the right photos (with and without dog) and add just the right links and tags. I've gotten to the point where I start a draft post in the middle of the night if something comes to me that I just have to write about. I'm having a hard time keeping up with my inspirations, though, both in crafts and in blogs. I still have a tie-dye wedding present to make, several months after the wedding (I'm allowed a year after the wedding! Really! But it's slipping away...). But I'll get to it, someday. And a leather-wrapped coffee mug... but hey, I did finish that quilt, finally!

But for now, since I don't have any late-night meetings scheduled, I'd better finish this off and head for bed. And since I know I'll hear about it if I don't, here are a few pictures. With and without dog.

Official Gratuitous Dog Picture

Here she is, just being her cute self.


Other Recent Stuff

Somebody liked my daughter's discharged jeans so well, she wanted a pair just like them. Several months later, I finally got around to it. My daughter did that tie-dyed shirt herself.


Here I am at this year's Maker Faire, in one of my favorite tie-dyed shirts (funny how the ones I like the best are some of the earliest ones I made). I was trying to complete a circuit and light the lightbulb using nuts and nails to go across the tube in the middle of the board. I succeeded, and they said they hadn't seen anyone do it that way before. I must be nuts...


And here is the result of the 6th Annual First Grade Tie-dye Project! I'm so proud! Even better, the Mountain View Voice published my picture of them (that's about a hundred kids) on page 6.


And now, off to bed!

Monday, January 12, 2009

Another Year of Creativity

It's my first post of the Year 2009, and also an anniversary of sorts, so maybe it's time to reflect a little. Don't worry, it won't hurt...

It has been just over a year since I started a leave of absence from my unusually-long high-tech career at Oracle. I've been there since January 15, 1989 (wow, 20 years ago), and I just needed a (long) break.

I've been very busy in the intervening year, and I haven't been a bit bored. Some projects have been very successful, others less so.

Kid Rooms and Craft Room

I spent quite a while rearranging the contents of several rooms in my house so that my two daughters could each have their own bedrooms. My older daughter got the "new" room with a new loft bed and desk combo so she could study uninterrupted by her darling sibling, and my younger daughter got a new desk in her room and free run of both bunks in the existing bed set. Meanwhile, I would take the contents of my two old craft/storage rooms and combine them into one carefully-planned ultra-functional hobby workroom with built-in shelves and workbench (the Broder line from IKEA).

Eight months or so later, the verdict is decidedly mixed. The girls like having their own rooms, but I'm not having much luck getting them to go do their homework there. They'd rather be working with me or their dad at the kitchen table or sprawled across the living room. In fact, if my older daughter disappears into her room, it's usually because she's hiding in there reading her latest non-homework-related book, and I have to go pry it away from her!

As for my sleek new craft room? The Broder shelving on one side is stunning, and no earthquake is knocking it down without bringing down the walls too! I installed lots of other shelves, cabinets, and drawer units as well. But I haven't been able to get past those basic little laws of physics: I really can't get the contents of two full rooms to all fit in the space of one! Not only is that new room FULL, but so are the hallways and other spaces around the house that were meant to serve as staging areas while I moved stuff around. On the good side, we're all getting very good at sliding sideways through the hallways! In the meantime, my stuff has expanded as I've picked up more hobbies...

The Blog

I started this blog just about a year ago as part of my leave-of-absence plans. Since then, I've written about 50 entries (almost one a week) in this blog, plus quite a few entries in my blog on Turkey (I keep meaning to get back and write more about that!) and my random-topic blog.

Writing has been a major part of my Oracle career over the years, and one of my Oracle colleagues noted with amusement that "a writer just has to write" (or something like that) when he heard about my non-work blogging (yes, I even did a little blogging for Oracle some time ago).

I've been using my blog partly as a way to ramble on without boring people around me to tears. "Mom, haven't you talked about recycling blue jeans enough for today?" The nice thing about blog articles is that if they bore you, you can skip to the next one! It's harder to tell your darling wife or best friend that you really don't care all that much about discharge dyeing, and would she please hush up for a while?

The blog is certainly useful as a reference work, both for me and others. If somebody wants to know how I did some project with the elementary school or the middle school, I can give them the URL, and they can come back to me if they have further questions. It helps both sides. For me, it serves as a reminder of how I did something before. It's useful to have a place to "dump my brain" so I don't have to worry about remembering details in my head a couple years later.

I hadn't expected that my dog Lacey would be such an important part of my blog. She's a smart little dog, though, and it didn't take her long to figure that when the camera came out, posing cutely was a good way of getting attention and treats! Yes, yes, you'll get your Lacey pictures at the end of this article...

The Rental House Remodeling Project

I spent pretty much all Summer and Fall remodeling my rental house (with the help of a really good contractor) for my father-in-law. I was pretty happy with how that project came out, including the fireplace cover.

The Jeans Circle Quilt from Some-Very-Warm-Place-Far-Below-My-Feet

I've written about the jeans circle quilt multiple times already, and it looks like I will have to write updates about it a couple more times before it's finished. I'm still working on it, but I stab myself with all those pins so frequently that it provides pretty strong negative reinforcement! I tend to let my fingers heal before I try tackling it again. It's also so big that it takes a lot of physical effort to muscle it through the machine. It's in three long pieces (queen sized), but if I ever do one of these again I'd do it in much smaller blocks.

I don't usually make New Year's resolutions, but I am making one this year: I will finish my jeans circle quilt (at least by the end of 2010). Sometimes it's all in how you word them.

Tie-Dye

Interestingly, I haven't done much tie-dye of my own lately, though I've helped hundreds of other people do tie-dye over the year, and I expect to keep doing that. Beyond individual projects like the couch and the silk scarf dress, there are really only so many tie-dyed t-shirts, socks and such that one family can wear! I'm not into serious production so much as I'm into experimentation, so selling at craft fairs or similar isn't really of interest. Etsy and eBay aren't really good outlets for tie-dye, though perhaps I didn't try hard enough to build a market there.

I was really excited to get my own page on the Featured Artists section of Dharma's website several months ago. That section is a terrific source to both give and receive inspiration for what one can do with textiles and color!

Teaching and running tie-dye events have been great, though. I did tie-dye at an elementary school and a middle school, two summer camps and family camp, some small parties and some private lessons, and a corporate activity for a group at Google. I already have plans for more events this coming year.

Leather Is the Latest Hobby

I wrote recently that I've started doing leather tooling. Besides collecting a multitude of tools and supplies that are joining the tie-dye stuff spilling out of the craft room, I've been making belts since my last post. I'm now working on my third belt (I'll write up the belts when I finish the current belt). My kids are enjoying doing this hobby with me, and my older daughter especially is getting quite good at it. "Quality Time With Family" is a good justification for an expensive new hobby, right?

Lacey Resolves to Keep Appearing in My Blog

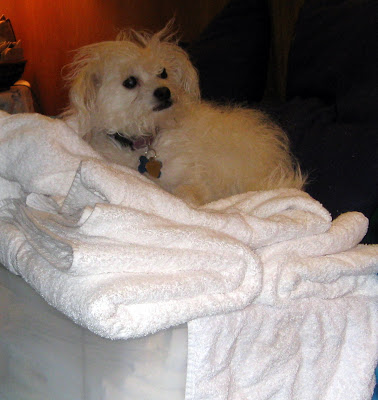
Lacey is cute, and she knows it. It's her key to survival, since she gets places she shouldn't and sheds on everything! I'm currently trying to sort all of my white stuff for tie-dye since I'm back to trying to fit everything in my craft room. I made the mistake of putting a big bin of soft, fluffy, clean white towels (that I'm intending to tie-dye eventually) on the couch. I later found her nestled in right on top!


Aaaah, very comfy. She's quite a princess. I wonder if she would notice if I put a pea underneath some of those layers of towels?


"Don't even think about it!"

"Do I really have to get up?"
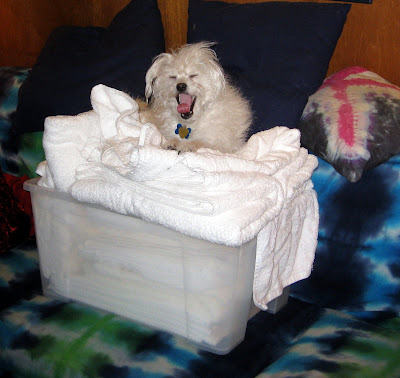

Oh well, I'll have to wash the towels again anyhow after I dye them.


"Happy New Year, and May It Be Full of Treats!"

Wednesday, December 24, 2008

Cross-cultural Inspiration and Whacking Leather

It's amazing how sometimes many disparate influences come together.

Colonial Days

Way back in March or April, my daughter's fifth grade class studied American colonial times. The teachers and parents put together an elaborate simulation of "Colonial Williamsburg", complete with tavern, church, government, leatherworking (cobbler), butter-making, and so on.


My part was the leatherworking activity, and of course I chose that one because I had never done leatherworking before! Arranging and participating in the activity was my first try at leatherworking. Fortunately I had lots of excellent help from Andy Stasiak of the local Tandy Leather Factory store--he even taught the kids himself! The kids loved the skunk skin he brought (though most of them wouldn't touch it).


A whole class of kids whacking leather!


That was a really noisy classroom! It was fun, though, and I learned that the mysterious toolset my dad had given me some time before was actually a pretty complete leatherworking set. I didn't do much with it at that point, though, other than play with it a bit.

Mexico and China

In Mexico and other Spanish-speaking countries, there is a craft called "papel picado", or "punched paper". Papel picado is created by using punch tools to make designs in multiple layers of brightly colored tissue paper. A few months ago, I was looking at paper picado designs with the goal of replicating them (somewhat) in my tie-dye. While I never managed to get exactly the results I wanted, I learned about another art form, and I did make a couple of fun tie-dyed banners.

Later, when I was visiting Japantown with the middle-schoolers, I bought some books. Besides books on shibori, I bought a book called "Cutting Paper Work of China". Well, it was probably called something else, but it was in Japanese, as was almost all of the text. What little English text there was (on the dust jacket) said that the book covered a folk art called "senshi". Senshi was/is practiced by housewives in China who cut paper into intricate designs of animals, flowers, and so on using scissors and small knives. Many of the designs and motifs struck me as being similar to papel picado, and the designs are fascinating in their own right.

Forward to Today...

All these things come together in my planning to make myself a tooled leather belt to replace yet another flimsy belt that is falling apart (and threatening to let me and my jeans down). Being the perfectionist I am, I want my (first) belt to be perfect, so I started practicing my leatherwork skills on something smaller: keychains/backpack tags/Christmas ornaments.

The first ones were pretty simple. I simply did individual capital letters with a border. I got lettering inspiration from another book, "The Art of Creative Lettering" by Becky Higgins, that I had handy from my scrapbooking days years ago.


Later, I started to branch out into birds and animals. Papel picado and my Chinese paper cutting book gave me ideas (such as the adapted bird on the branch, below), and I browsed the Internet for pictures of kittens and other creatures. I found pictures of peacocks in their full glory at http://www.peafowl.org (I had no idea there were so many types of peafowl!). The flower design in the upper right corner came from a Tandy pattern.


Tooling the Leather

There is a specific sequence for a lot of decorative leather tooling. First, you draw the pattern on paper, then dampen the leather (called "casing the leather") and trace the lines with a stylus (kind of like a ball-point pen with no ink). That gives the design on the leather like this kitten below (the lighter lines are where I used the stylus directly on the leather instead of through the paper).


You cut along the lines using a special leather cutting swivel knife (right, below). Beveling along the cut edge with a beveling tool (left, below) and a mallet gives the picture definition (see above and below the paws, and in the ears for beveling).


I used various stamping tools to refine the picture, adding stars to the pillow, and so on.


I used the knife again to make little cuts for the whiskers at the very end.

How About Some Color?

I also added color to several pieces. I used Tandy's Eco-Flo All-in-One finishes to both color and protect the pieces. In the picture below, I colored all four. The J, A, and M are all using the same Mariner Blue color, but I have rubbed the M with a piece of an old cotton dishtowel to make it shiny.


For the A in the following picture, I have rubbed the left side only. The All-in-One works really well--it only takes about 4-6 strokes with the cloth to get the leather shiny! I do more strokes to get the piece as shiny as possible all over.


For scale, the leather pieces I'm using are all about 2.5 inches tall.

Here are some pieces that I painted more elaborately with various colors of the All-in-One.

Diluting the paints gives a whole new range of possibilities.


Ooh, Ooh, Me Too!

My kids decided the leatherwork looked like to much fun to let me do it undisturbed. They jumped right in, putting their own spin on letters and other designs. My younger daughter found a dolphin design in a coloring book, and adapted it with her own ideas. She did two of those plus several others.


My older daughter did both pictorial pieces and geometric pattern pieces, though she wasn't interested in painting them:

We even had a couple of my older daughter's friends over to do some. They had a blast (and I thought the ringing in my ears would never go away!).

Gratuitous Dog Pictures

Lacey didn't get much chance to help out on these little projects, but I thought she could model some of them.

I think maybe it's just a bit overmuch on the bling, dahling!


To Be Continued at Some Point...

I'm having so much fun with my little keychains that it will probably take me a while to get around to doing the belt I'm planning (and there is still that jeans circle quilt languishing on the sewing machine). It's just so much fun to create all these little miniature works of art!

Wednesday, November 19, 2008

Dye Week at the Middle School

After months of off-and-on preparation work, I finally did my week-long half-day dyeing class for a bunch of middle school girls. We spent the time exploring several different ways of using "resists" with dye to create patterns on fabric. Like any class, it had both successes and failures, but overall, I think it went well, and both the girls and I learned a lot.

Day by Day

Monday we did basic tie-dye patterns such as stripes and spirals and rays, and each girl tie-dyed a white t-shirt. This is the same sort of thing I've been doing with groups for quite a while now, and the individual results mostly varied depending on how carefully they tied and dyed their shirts.

Tuesday we did stitch resist on bandanas. Stitch resist didn't work very well for the class. Most of the girls (grades 6-8) had trouble stitching their designs (on cotton bandanas) and pulling and tying them tightly enough, so the stitching didn't really resist the dye and their designs got lost. On the other hand, a shibori technique of folding and clamping silk hankies with various clips worked very well. Almost all the girls came out with strongly-geometric designs that were really beautiful.

Here is the group with their shibori silk hankies:

What beautiful patterns!


Wednesday we did discharge dyeing (bleaching dark colors to have light-colored patterns). We started with an experiment where we put Soft Scrub with Bleach on many different scraps of fabric to see what effects it would have. We saw that on the all-synthetic socks we got no effect, but that on dark blue fabric we got nearly white patterns. We then did designs on black T-shirts. Since I had gotten black shirts specifically meant for discharge dyeing, and I had run out of prep time beforehand, I hadn't tried one before class. They turned out to work well, bleaching much faster than I had expected, to a nice rust color (they don't bleach to white from the black). Several girls also bleached patterns onto jeans with stencils (I love that part--those jeans are now their own designs, not those of some brand name designer!). This technique was a big hit! One girl liked it so much she did more of it for the rest of the week during any free moments. We also did "regular" tie-dye on tote bags while they were waiting for the Soft Scrub to work.

Thursday we did "fake batik" (using glycerin soap instead of wax) on bandanas. The soap batik counts as the main failure for the week. Even though I had been successful with it in my trials at home, the conditions in class made it a lot harder. The main difference was the temperature of the melted soap when the girls tried to apply it to the cloth. At home, I worked right at the stove, and the soap stayed an even high temperature the whole time. At school, I couldn't have the girls working over the portable electric burner I used, so I took the pot to their table once the soap was melted. The soap cooled much too quickly, clogged up the tjanting tools, and hardened before going onto the fabric. Since the soap didn't penetrate the fabric properly, so it didn't resist the dye, and the designs were mostly lost. Wax would have had all the same problems under these working conditions (no heat at the working table). One additional problem with soap, though, is that very thin lines can get washed out in the soda ash soak, and many of the girls' lines were too thin as well.

Friday I gave them each another cotton bandana, and we all folded them into eighths (triangles). I then showed them the marking-pen-and-pleating technique that I first learned from Michael Fowler's Art of Tie-Dye DVD. They dyed their pieces, and then I let the pieces sit about an hour. I rinsed them in cold water enough so we could look at the designs and hang them out to display for the end-of-week assembly. They came out beautifully, with bold geometric patterns. We finished the week with a short but fabulous fashion show at the assembly.


Now That It's Over

I had a lot of help with running this class. One of the moms came in to help for the whole class, and my housemate came in for two days as well (many thanks to both of them!). For a class of nine girls, that ended up being about the right amount of help, so nobody had to wait too long before we could help them The girls did need a fair amount of help, especially with the stitching and the batik, though not as much help as the first graders I usually work with.

If I were to do this class again, I'd do it a bit differently. I'd skip the stitch resist and the batik completely and save those for the adult classes. I'd do more "classic" patterns like crinkle on white shirts and bandanas. One thing I'm glad I did right was to confine the discharge dyeing to using just the Soft Scrub, and not using buckets of bleach in water or spray bottles of bleach and water. I had several pretty high-energy kids in this class, and those could have been a disaster. The Soft Scrub is really easy to deal with from a safety and control perspective.

Budget is always a factor for classes like these. I had a budget of $20/girl for the whole week, or $180 total. Bandanas are good pieces for the class. They cost about $1 each in bulk. I buy them at the same time I buy lots of other stuff, like all the inexpensive white t-shirts (about $2 each) and black t-shirts (about $3 each) . Silk hankies were less than a dollar each and the results were very satisfying; I'd do more of those next time. Tote bags were about $3 each. I spent about $22 on four bottles of Soft Scrub, and most of it got used up! I spent about $1.50 per girl on gloves (they preferred larger reusable latex gloves over the close-fitting disposable nitrile gloves), and the rest was trash bags (for smocks), dye (the largest portion, about $25) and chemicals. I've already got many sets of goggles and most of the infrastructure equipment (squirt bottles and such).

One thing the kids liked, of course, was that there was a lot of stuff to take home with them, and it was even better because they had made the pieces beautiful.

So would I teach this class again? Oh yeah, next chance I get!

Monday, October 27, 2008

Fabulous, Dahling!

The middle school kids I'm preparing to teach get to choose from a variety of interesting classes they might want to take during their "intersession" week, with everything from surfing (in water, not on the Web) to chocolate, belly dancing to basketball, quilting (I could use that one myself!), and of course my class, "Resisting Dyeing". The organizers of each class make a short presentation to try to entice the kids to take that class.

As part of my own sales pitch to them, my daughter and I wanted to show off a "final product" that could be achieved with the discharge dyeing technique. So she grabbed a pair of her newest, nicest, darkest blue jeans (moms everywhere cringe in unison at the thought), my binder of stencils, and off she went.


She taped down the stencils into her design, then used a stenciling sponge to daub on the Soft Scrub with Bleach. She did the whole design, and then let it sit overnight. Imagine our disappointment when the design came out to be visible only in a few places!


We then redid the whole design with more Soft Scrub and the stencils.


We put a bit extra Soft Scrub on places that we wanted to be extra white, such as on the eye and back fin of the seahorse below. Notice the slight brownish tint on the fin of the fish. The Soft Scrub turns faintly brown where the bleach is reacting with the dye. I found that the Soft Scrub was "done" when it had turned uniformly pale yellowish brown over the whole design.


Again, the design came out much too faint (I think the bleach had become "exhausted" by the high amount of dye in the very dark jeans), but at least it was visible.

I then did the design a third time freehand with the squirt bottle directly onto the jeans, putting on a very thick layer (imagine drawing with white glue--it's about the same consistency). Here I've just started doing that with the fish at the top of the design:

This time the design came out in the desired brightness, with subtle shading effects where the bleach had been thicker and thinner.


Here is my daughter's finished pair of jeans:

Fabulous, Dahling!

P.S. Certain members of my audience have become more, shall we say, vociferous in their demands to see more pooch pictures in my blog. Two such members were adamant enough that they were willing to pose for more pictures to make it happen...