Wednesday, January 21, 2009

Belting it Out

Like any craft, leatherwork requires a lot of learning and practice to get good at it. And like the true dilettante that I am, I'm going to work really hard at it, and collect all the tools and supplies for it, until I'm pretty good (but not great) at it--just good enough to prove to myself that I can do it--and then move on to something else. After all, I always need more stuff to stuff into my craft room, right?

In any case, I had a great time doing the leather keychains, and they made good test pieces as well as great little holiday gifts. But once the holidays were over, it was time to move on, and I'm still avoiding working on my jeans circle quilt.

It was time for... the belt.

The Pattern


I've always liked Celtic knot and chain patterns, and I also wanted to do kind of a sampler to show off various basketweave patterns and designs. I found a chain design on the web, then copied a part of it and modified it on my computer using the drawing program in Sun's OpenOffice.org software. I'm pretty fond of that drawing program--it's great for repeating and resizing patterns and motifs--and best of all, it's free!

I put various sizes and shapes of the design on a single sheet and printed it out. I got a 1.5-inch-wide belt blank from Tandy to start with, then used the one design strip that fit best on my belt.


I wet the leather of the belt and used a creasing tool to press in straight lines a quarter inch in from each long edge of the belt. Then I traced the chain design into the leather using a ball-point stylus. I repeated the design as needed, then ended the design by making the big chain openings into loops. The idea was to have the design end on either side of the buckle and billet (the piece with the holes) sections.

Once I traced the design, I used the swivel knife to cut the entire design, then used a beveling tool to stamp down along the outer edge of the design. The following picture shows the belt after this first beveling.


From there, I used various stamping tools to fill in each of the large chain spaces with different patterns.


The dark spots on the right end of the picture above are the snaps that hold the buckle. The buckle tongue goes through the cut slot, and the end folds over to snap in the back of the belt. The plain part of the belt on the left end will be the billet, where I'll punch the holes.

I got to the point in the picture above, then tried on the belt to figure out exactly where to punch the holes. I had measured my old belt before starting the new one, but I found I had made a tactical error when I traced the pattern: the patterned section was too long, and the belt would be too big for me unless I put holes into the pattern! Ouch.

Well, my hubby won the leather lottery this time, since his waist is a bit bigger than mine. He wanted the belt to be dark brown (what? not purple??), so I coated the belt with the All-in-One and handed it over.


I had another belt blank handy, so I did the whole thing again, with one fewer chain link repeat this time! I did different patterns in some of the big loops too, and then dyed my belt blue. This time my belt fit. I spent about 8 hours on each belt--leatherworking requires a great deal of patience!


Learning Curve


I've been taking my work in to my local Tandy store for critiquing and advice. As I mentioned, there is a lot to learn. The two main helpful comments I've gotten have been to keep my swivel knife blades sharper and to keep my leather wetter as I work it.

The too-dull blades show up as (relatively) ragged-edged cuts, because they drag the leather along instead of slicing through it like, well, a knife! Rob at Tandy told me that while I was polishing the blade just fine with jeweler's rouge, the blades needed more drastic sharpening first. For this, I needed to drag the blades on a flat piece of 600-grit sandpaper (which I finally found in the automotive section of my local hardware store).

Keeping the leather at the right wetness, or casing the leather, affects how deep the stamping tool impressions go. If you want your pattern to appear in sharp relief (yes, you probably do), then you need the leather to be wet all the way through--but not too wet. If it's too dry, the leather is hard, and the tool only leaves its impression on the very surface. Too wet, and the leather just kind of moves around like soft clay or putty, and doesn't compress enough to hold the pattern well. Books suggest keeping your work damp in a plastic bag overnight, but you have to be careful to not let the work get mildewed! Yum.

I also learned that, while the All-in-One is really easy to use and gets great colors, it's really not the right choice for leather that will get a lot of bending and wear. Since it is both a dye and a finish, it doesn't penetrate very deeply, and it tends to crack a bit when the leather is bent or scraped (the billet section, for example, where it goes through the buckle).

Here you can see the finish cracking a bit on the back side of my blue belt (as well as how the snaps work with the buckle and the keeper, which is a separate loop of leather).


The All-in-One was great for the keychains, though, which don't get the same type of abuse as a belt. For my belt, the cracking is only visible when I'm looking at the back, so no big deal. I can always touch it up a little if I need to. For future belts I'll use separate dyes and finishes, though.

One more thing: half the fun of making belts is choosing the buckle. These are from Tandy.


His and Hers belts. Aaaw, too cute...


More to Come

And speaking of future belts, obviously I need to do at least one more so I can experiment with dyes! So I've already started the next one, but that's a topic for another blog.

Monday, January 12, 2009

Another Year of Creativity

It's my first post of the Year 2009, and also an anniversary of sorts, so maybe it's time to reflect a little. Don't worry, it won't hurt...

It has been just over a year since I started a leave of absence from my unusually-long high-tech career at Oracle. I've been there since January 15, 1989 (wow, 20 years ago), and I just needed a (long) break.

I've been very busy in the intervening year, and I haven't been a bit bored. Some projects have been very successful, others less so.

Kid Rooms and Craft Room

I spent quite a while rearranging the contents of several rooms in my house so that my two daughters could each have their own bedrooms. My older daughter got the "new" room with a new loft bed and desk combo so she could study uninterrupted by her darling sibling, and my younger daughter got a new desk in her room and free run of both bunks in the existing bed set. Meanwhile, I would take the contents of my two old craft/storage rooms and combine them into one carefully-planned ultra-functional hobby workroom with built-in shelves and workbench (the Broder line from IKEA).

Eight months or so later, the verdict is decidedly mixed. The girls like having their own rooms, but I'm not having much luck getting them to go do their homework there. They'd rather be working with me or their dad at the kitchen table or sprawled across the living room. In fact, if my older daughter disappears into her room, it's usually because she's hiding in there reading her latest non-homework-related book, and I have to go pry it away from her!

As for my sleek new craft room? The Broder shelving on one side is stunning, and no earthquake is knocking it down without bringing down the walls too! I installed lots of other shelves, cabinets, and drawer units as well. But I haven't been able to get past those basic little laws of physics: I really can't get the contents of two full rooms to all fit in the space of one! Not only is that new room FULL, but so are the hallways and other spaces around the house that were meant to serve as staging areas while I moved stuff around. On the good side, we're all getting very good at sliding sideways through the hallways! In the meantime, my stuff has expanded as I've picked up more hobbies...

The Blog

I started this blog just about a year ago as part of my leave-of-absence plans. Since then, I've written about 50 entries (almost one a week) in this blog, plus quite a few entries in my blog on Turkey (I keep meaning to get back and write more about that!) and my random-topic blog.

Writing has been a major part of my Oracle career over the years, and one of my Oracle colleagues noted with amusement that "a writer just has to write" (or something like that) when he heard about my non-work blogging (yes, I even did a little blogging for Oracle some time ago).

I've been using my blog partly as a way to ramble on without boring people around me to tears. "Mom, haven't you talked about recycling blue jeans enough for today?" The nice thing about blog articles is that if they bore you, you can skip to the next one! It's harder to tell your darling wife or best friend that you really don't care all that much about discharge dyeing, and would she please hush up for a while?

The blog is certainly useful as a reference work, both for me and others. If somebody wants to know how I did some project with the elementary school or the middle school, I can give them the URL, and they can come back to me if they have further questions. It helps both sides. For me, it serves as a reminder of how I did something before. It's useful to have a place to "dump my brain" so I don't have to worry about remembering details in my head a couple years later.

I hadn't expected that my dog Lacey would be such an important part of my blog. She's a smart little dog, though, and it didn't take her long to figure that when the camera came out, posing cutely was a good way of getting attention and treats! Yes, yes, you'll get your Lacey pictures at the end of this article...

The Rental House Remodeling Project

I spent pretty much all Summer and Fall remodeling my rental house (with the help of a really good contractor) for my father-in-law. I was pretty happy with how that project came out, including the fireplace cover.

The Jeans Circle Quilt from Some-Very-Warm-Place-Far-Below-My-Feet

I've written about the jeans circle quilt multiple times already, and it looks like I will have to write updates about it a couple more times before it's finished. I'm still working on it, but I stab myself with all those pins so frequently that it provides pretty strong negative reinforcement! I tend to let my fingers heal before I try tackling it again. It's also so big that it takes a lot of physical effort to muscle it through the machine. It's in three long pieces (queen sized), but if I ever do one of these again I'd do it in much smaller blocks.

I don't usually make New Year's resolutions, but I am making one this year: I will finish my jeans circle quilt (at least by the end of 2010). Sometimes it's all in how you word them.

Tie-Dye

Interestingly, I haven't done much tie-dye of my own lately, though I've helped hundreds of other people do tie-dye over the year, and I expect to keep doing that. Beyond individual projects like the couch and the silk scarf dress, there are really only so many tie-dyed t-shirts, socks and such that one family can wear! I'm not into serious production so much as I'm into experimentation, so selling at craft fairs or similar isn't really of interest. Etsy and eBay aren't really good outlets for tie-dye, though perhaps I didn't try hard enough to build a market there.

I was really excited to get my own page on the Featured Artists section of Dharma's website several months ago. That section is a terrific source to both give and receive inspiration for what one can do with textiles and color!

Teaching and running tie-dye events have been great, though. I did tie-dye at an elementary school and a middle school, two summer camps and family camp, some small parties and some private lessons, and a corporate activity for a group at Google. I already have plans for more events this coming year.

Leather Is the Latest Hobby

I wrote recently that I've started doing leather tooling. Besides collecting a multitude of tools and supplies that are joining the tie-dye stuff spilling out of the craft room, I've been making belts since my last post. I'm now working on my third belt (I'll write up the belts when I finish the current belt). My kids are enjoying doing this hobby with me, and my older daughter especially is getting quite good at it. "Quality Time With Family" is a good justification for an expensive new hobby, right?

Lacey Resolves to Keep Appearing in My Blog

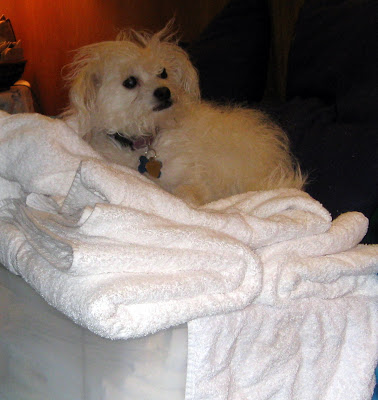
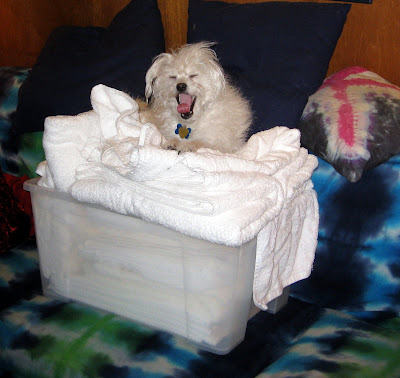
Lacey is cute, and she knows it. It's her key to survival, since she gets places she shouldn't and sheds on everything! I'm currently trying to sort all of my white stuff for tie-dye since I'm back to trying to fit everything in my craft room. I made the mistake of putting a big bin of soft, fluffy, clean white towels (that I'm intending to tie-dye eventually) on the couch. I later found her nestled in right on top!


Aaaah, very comfy. She's quite a princess. I wonder if she would notice if I put a pea underneath some of those layers of towels?


"Don't even think about it!"


"Do I really have to get up?"


Oh well, I'll have to wash the towels again anyhow after I dye them.


"Happy New Year, and May It Be Full of Treats!"