I'm still preparing for my class for middle school kids. I usually sign up to do these things if it's something that I'll learn from, as well as something my students will learn from. In this case, I've designed the class intentionally so that I'll teach the kids some things I've never done myself! It forces me to try new things and gives me inspiration. The discharge dyeing was one of those crafts I'd never done before, but I'm planning to teach it, so I had to try it out (I still have more experimenting with that to do, too!).
The next topic for the class is batik. That's on purpose. When I first got the dyeing bug five years ago, thanks to my daughter's 6th birthday party, I went a little crazy with exploring the color-on-fabric medium and
Dharma's catalog full of textile arts goodies. Among other things, I got a pound of
batik wax and some
tjanting tools for applying the wax, planning to try out doing batik. Five years later, the stuff was still sitting unopened in a drawer, so drastic measures were required, such as teaching it to kids!
I found a lot of information on batik on the web. For example, Paula Burch has an excellent discussion on
batik on her
extensive hand dyeing website. I also have a book called "
Tie Dye To Die For & Batik You Can't Resist!" with good information, among others.
Getting StartedI melted the batik wax in its foil tin inside an old (that is, sacrificed to the cause) frying pan that was full of boiling water. I kept the stove burner on a low setting, but I found that the water had to be at a bubbling boil for the wax to get hot enough. If the wax is too cool, it beads up on the surface of the fabric. It has to penetrate the fabric thoroughly to resist the dyes properly.
Using the tjanting really takes some practice. I was just making a sampler on a bandana, not a work of art, so it didn't matter much if I got drips all over, but if I were to get serious about batik I'd need to work on my tjanting skills--for about a year! The hard part is to tilt the tool up just enough to stop its dripping from the tip, but not so much that the wax dribbles out the filling hole on the top and runs down your arm. Yikes.
Here is my pan of boiling water. The batik wax is on the left with the tjanting in it. Notice the frothy, bubbly water in the frying pan--that's what it looks like with lots of wax dripped into it by a tjanting amateur. "Bubbling like a witch's brew in a cauldron" would be a good way to describe what I found to be the right temperature.

I taped my bandana taut to a
jelly roll pan (that's a cookie sheet with 1-inch high sides) so my working area would not touch the metal (a handy version of a silk painter's frame). That was useful because I don't have many empty flat surfaces in my house, so I could just stack this on top of everything else to be near the stove (works better than just dumping everything else on the floor!). I did have to keep shifting and re-taping the bandana to get at all of the bandana's area, though.

Here is my bandana with the wax applied. In the lower right corner I tried using a metal cookie cutter to apply the wax. That's supposed to be a frog. Near that is a big dark area where I painted wax on with a paintbrush between lines I had already done with the tjanting. I wanted to have a big area to test out the crackle effect.

I wadded up the corner of the bandana to crack that big area of wax and the surrounding areas (though all of the wax got somewhat cracked due to my generally-rough handling).
 Other Resists
Because getting rid of the wax is such a pain, many people have tried out
using other resists instead of the wax. They have various limitations, though, such as not producing the characteristic cracked effect found in real batik. At some point, while I was making glycerin soaps with my kids, it occurred to me that the soap itself might make a good resist that could then just wash right out at the end. The melting temperature and viscosity is similar to that of wax.
I melted some of the glycerin soap in the same frying pan full of water with my batik wax. That's the small handled pot in the picture above. I applied the soap to the upper right corner of my bandana with a second tjanting.
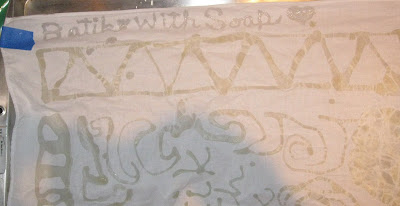
The glycerin soap is shinier and less yellow than the wax.
DyeingI used direct application for the dyes--I'm a big fan of immediate gratification! I gently soaked the bandana in a small bucket of soda ash solution, separate from my usual soaking bucket, because I didn't want to contaminate all my mixed-up soda ash solution with the water-soluble soap. Then I painted or squirted on dyes that I had around from recent tie-dyeing (same
Procion dyes anyhow). One advantage of batik direct application is that I used less dye than I would have to tie-dye the same bandana. I let it sit overnight.
 Resisting Resists
Next came the not-so-fun part, removing the resists. The soap, as expected, came right out in the cold-water rinse I always do for tie-dyes (to remove the soda ash and the worst of the excess dye). Then I tried various things to get rid of the wax. I tried bending it to remove the big chunks and drips. That helped a little. Scraping with a dull table knife was hopeless.
Then I tried boiling in water. Unfortunately I didn't have a multi-gallon pot (as
Paula suggests) that I was willing to sacrifice to the cause. The wax and the soap might be food-safe, but there is still a lot of excess dye in the bandana. The pot I used was small, and the water immediately became dark blue with excess dye (and the bandana stuck out of the water in places, too). So if I wanted to change the water multiple times rather than boil blue dye onto my nice white batik lines, I had to do something about the wax. It was a mess. I scraped some off with a cold spoon, which helped some but was ridiculously tedious. I tried a fine strainer, which simply clogged. I tried paper towels in a coarse strainer, and the water poured past the paper towel (not held in well enough). I hate to think how much wax is now clogging my kitchen pipes!
I finally had done enough rinsing and wax removal that I wasn't concerned with dye redepositing. I went out to the garden, got a few rocks, and plopped them in to boil with my bandana and hold it down under the surface. I then let the water cool, and I scraped enough wax off the surface to get my bandana out.
I hand-washed the bandana with Synthrapol, let it dry, and here it is.

Since I was just making a sampler, I didn't worry about the age of the mixed dyes, so they look a bit more faded than an experienced Procion dyer would expect. The purple especially didn't hold its color--it was the oldest mixed dye. I've found that greens particularly, then purples and blues, lose their color strength the fastest (the
New Emerald Green here was fresh). I've learned to make up fresh batches of dyes when I'm doing something where the color and brightness is important.
Here's the corner where I used the soap as the resist. Soap didn't get the really sharp, crisp edges wax gets, but it does get some cracking. I think it would have been helpful to have the soap a little hotter than the wax, though, so it could have penetrated a little better.

For my class, given that we won't have much time and there is very little budget, I'll show my students the difference between the wax and the soap, and then we'll use the soap. The soap has the advantage that it's easy to get in any craft store, and they can melt it using a microwave (repeatedly, but it does work). Then they can take their work home to wash it, and I won't have to worry about their parents calling me to complain about clogged drains!
And in my case, I still have a lot of wax to clean off the stove, the oven below it, the floor, the sink, the pans... I'd hate to lose my crafts-in-the-kitchen privileges. I'm getting close to that, though, since I still have my sewing machine on the kitchen table while I work sporadically on that
jeans circle quilt. Eeek!
Dang Dog!My little publicity hound somehow sensed I was going to take blog pictures tonight. I had just laid the white sheet and the bandana down on the floor and had gone into the other room to get my camera. In that short time, she went and found a squeaky toy and started cavorting with it in the middle of my photo setup!


My daughter tried to help distract Lacey while I set up again (but Lacey had no intention of letting go of the toy).

She only gets away with it because she's cute...

I'm thinking next time maybe I should batik the dog. But I'll have to use the soap instead of the wax. Wouldn't want any waxy buildup on that fluffy white fur!


 Now I'm starting to put the bricks on with a natural sponge. I mix colors right on the sponge. A little water helps to blend the colors more.
 Time to light the fire...
 A couple hours later, it's looking good enough to call it "done"--of course, now that I'm looking at the photo, I see things I want to go back and fix! ("Sara, step AWAY from the paints!")
 Now I've put back the real fireplace screen we've had there for years. The whole thing took me somewhere between 8 and 10 hours. This is for my father-in-law's house, and now I'm thinking my house needs one too. Of course, first I'd have to FIND our fireplace! It's behind some huge shelves full of kids' craft supplies. Maybe another time...


