Saturday, June 20, 2009

Tie-Dyeing the Bookcases

Now that my older daughter is on summer vacation (though she still has homework to do), she has a bit more available time. It's time to do some rearranging in her room to make it easier for her to store and find all her stuff going forward.

Bookcases with Glass Doors and a Little Inspiration

We bought her two Billy 79.5-inch tall, 31.5-inch wide bookcases, along with two pairs of coordinating half-height (37.75-inch high) Billy Morebo glass/aluminum doors. IKEA mentions on its website, and displays in the showroom, that these can be easily personalized by adding wrapping paper, fabric, stickers, etc. between the glass and the backing insert of the door. Just that little hint, and off we go!

My daughter loves blues and greens, and her room is already decorated in those. She's excited about getting her glass doors done in blue-and-green tie-dye to match the rest of her room. Guess who had some influence on the color scheme when I tie-dyed the couch?

A while back I got a bunch of IKEA's Sova twin-sized flat sheets (cheap, 100% cotton, and they dye beautifully). Note that the Sova line has since been replaced by the Dvala line, which is still all cotton but a little more expensive. The Slumra line (now the cheapest line) is unsuitable because it is 52% polyester and won't dye well.

I folded a sheet in eighths (which turns out to be the perfect size, just a bit bigger than the door inserts), then tied it in a pattern and dyed it. After dyeing, I cut off half the sheet since we didn't need it. We hemmed it, and now my daughter can use it as a drape for her loft bed or whatever.


I cut out four matching pieces the size of the inserts plus 1.25 inches extra all around.

Here I laid one of the inserts on top of the corresponding fabric piece.


We're using the leftover strips (about 4-6 inches wide) to make scrunchies for hair.

We attached the fabric to the inserts with Scotch tape. We don't care if the back of the door looks a little messy, and the tape just has to hold well enough for us to install the inserts into the glass doors.


We installed the inserts into the glass doors and installed them according to the instructions. Once we got everything put together, it looked like framed posters of some wild graphic art.


That's the extra half sheet draped over a curtain rod on the right side of the picture. Here's how it looks with the doors open:


My daughter kept running around it singing "It's so pretty!" Well worth the cost and effort just for its looks. Now if only it helps her keep her room clean!

More Gratuitous Dog Pictures

Lacey knows when it's time to join the photo shoot. Here she's sitting on the wrapped inserts.

She's even brought her own props!


Who can resist that pose?

Friday, June 12, 2009

Look! It's a Quilt!

If Abercrombie and Fitch were to sell quilts, this would be it. It's ratty and frayed. It has the dusky patina of ground-in dirt. It's irregular and uneven. Maybe it's not ripped up enough to meet those trendy A&F standards, but one has to draw the line somewhere.

The jeans circle quilt is done. Well, at least for now. Until I decide to do more stuff to it. But for now, done. Oddly, having it finished seems pretty anticlimactic. It's probably because I don't really have a place or a use for it, since I really just did it for the challenge of it. It took me so long to make (just over a year of on-again, off-again work), and so much physical effort, that I feel I have to hang onto it until I find the right place for it.


The Stats

The "Quilt from Hell", as I'd taken to calling it, has 221 jeans circles (from roughly 30 pairs of recycled adult jeans) and 221 ~5-inch squares cut from a tie-dyed recycled sheet (as well as 442 squares of polyester batting). It weighs 8 pounds according to my scale, but it feels like more.


I had made it up into three long sections, and then put the three sections together. That was one of the reasons making the quilt was so difficult; I had to physically muscle those huge and heavy sections around and through my regular home sewing machine (a Husqvarna Viking Emerald 118). In hindsight, I would have made nine smaller sections and put those together at the end.


It's Unique

The quilt is definitely unique. Besides the randomness of the recycled jeans circles in various shades, which are then laid out in a specific design, I also had the tie-dyed sheet. I had dyed it in a chevron pattern, then cut it all up and rearranged all the pieces. Someone I know wonders why people would take perfectly good fabric, cut it up, and sew it back together again. I just tell her to think of it as making paint from minerals and then smearing it on canvas--it's art. And in this case, it's taking something that isn't perfectly good (the worn out jeans) and putting them to good use.

Extra Special Style

My quilt has something that no Abercrombie and Fitch quilt would have: dog hair incorporated into its deepest recesses. Lacey thinks that's just perfect.


P.S.: I've managed to achieve my New Year's resolution! This may be a first!

Sunday, May 17, 2009

Seat of the Pants

I'm not all that fussy about appearances, and my house is furnished in "Early American Hand-Me-Down, Kids-and-Hobbies". However, I had to do something about the dining room chairs when their covers started ripping from long wear. The table-and-chairs set was left to us by an old housemate when he moved out, and he had bought them at a garage sale before that. They are perfect for our casual lifestyle of feet on the furniture, food spilling, painting, leather working and sewing at the kitchen table. So they were already ugly, but the rips made them uncomfortable too.


In keeping with my waste-not-want-not leanings, and because my friends are still giving me their worn-out jeans (Yay! Keep it up!), the perfect material was obvious: recycled denim! I had also recently bought a book at a silent auction, "The New Sampler Quilt" by Diana Leone, and making sampler blocks for the chair covers seemed like a project I might be able to finish in a reasonable time (where "reasonable" is defined as "less time than the still-unfinished Jeans Circle Quilt from Hell").

The Jeans

For my six chairs, I used the legs of 10 pairs of adult jeans. Four pairs of varying colors (black, dark blue, medium blue, light blue) went to form the quilt blocks. Then I used one pair of legs for the surrounding sections on each chair.

The jeans pocket sections went to the middle school for a group making bags for a school project.

Finding the Grain

Quilt tops work better if the pieces are cut on the grain of the fabric. The grain of reused jeans isn't always obvious because of the diagonal pattern of the denim weave, so I found the grain by pulling off thread after thread (fraying the denim) until I had a straight edge I could work from. Fortunately I had plenty of excess on the jeans legs.


The Squares

Each chair has a different classic quilt square design. I did Wheel, Spools, Ohio Star, Monkey Wrench, King's X, and Card Trick (the hands-down favorite of the household--it's the one behind the dog).


I made templates from the patterns in the sampler book, traced with kids' washable markers and cut them out, and machine pieced them following the instructions in the book.

Once the squares were pieced, I sewed on the fabric from a pair of legs around the square to make the background. I washed the covers after that to get rid of the washable marker.


Quilting

I used batting left over from a previous project. For the quilt backing, I reused six small flannel receiving blankets (complete with Pooh or teddy bear pictures!) that I had left from when my two kids were newborn babies. This would never be visible, but it wouldn't hurt to have something sturdy but soft wrapped around the padding and the wooden seat bases.


I machine quilted the three layers "in the ditch" along the seam lines between the square design pieces so the sewing wouldn't be very visible.


House of Foam

Padding matters. I got a couple of different "chair-sized" pieces of padding at the local fabric/crafts store. These were two inches thick. One was Airtex High Density Foam. The other was Poly-Fil NU-Foam, which is a compressed polyester fiber pad. Unfortunately they were too small for my chairs, but my family sat on them for a week or so to try them out. I found they were too thick to fit well under the backs of the chairs, but they weren't firm enough. When we sat on them, we'd go right down to the wood surface beneath.

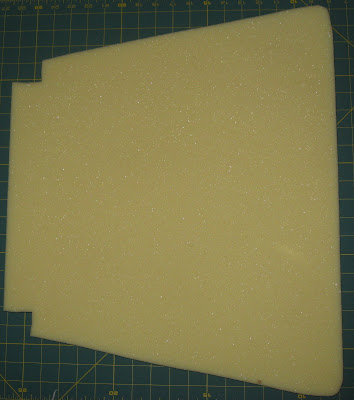
I went to a place called House of Foam in Palo Alto, CA. The proprietor suggested 1" thick high resilience (HR) foam, which he said is the usual one he sells for dining room chairs. It cost about $12 per chair (just slightly more than the same amount of the other padding types would have cost), but as his website says, "Generally the firmer the foam, the longer its firmness will last, and the more expensive it is." However, what I got from House of Foam was definitely the right stuff. They even cut it to shape and glued it onto the the chair seats for me while I ate lunch across the street, making it well worth it for me to go to such a specialty shop.

Putting It Together

I cut off the excess from the quilted covers, then I sprayed the covers with a coat of Scotchgard in the (probably vain) hope that the covers would stay cleaner longer. I used a staple gun to attach the cover over the foam and around to the bottom of the wooden seat pieces. Each seat was then attached to the chair legs and back with four screws, so that part was easy.


Here is the finished set of chairs.


New Beginning and the End

Interestingly, when I removed the previous covers from the wood, I found that these chairs had been recovered at least twice before (old staples and tacks, shreds of two other fabrics). It feels kind of nice to be carrying on a tradition of reuse, and not just throwing something away because it was old. I did, however, grit my teeth and throw out the old cotton padding and fabric covers. They had done their share of service.

Gratuitous Dog Pictures

I managed to sneak in one or two blog entries without dog pictures, but this entry required a lot of pictures, and Lacey now comes running if she even hears the camera turn on.

She's a big help!


She looks like this chair is made for her.


After all, since I have to let my kids sit on these chairs, why not the dog? The kids are often messier!

Wednesday, May 13, 2009

Shoe Mania, Part 4: They're Multiplying!

I was so pleased and excited by the results of my first pair of sandals that I immediately started on three more pairs. I had another design that I wanted to make for myself, and of course both of my daughters wanted some too.

Younger Daughter's Pair: Fancy Thong Sandals with Horse Head Conchos

My younger daughter flipped through the "Sandal Making" book and selected a thong style. Of course she wanted a small modification to the style to make it just what she wanted. She wanted a horse head decoration in the middle of the shoe. Tandy had some matched right- and left-facing horse head conchos that were just the thing.

I cut out the bottom soles and heels for her shoes. Her shoe size is about a kids' size 2, and it took about a square foot of saddle skirting leather.


It's easy to make a long oblong slot for a wide strap even if you don't have a big enough punch. Simply punch a second (or third) time, overlapping the ends of the hole, as in the following picture.


The colors and dyeing process were pretty similar to what I did with my first pair. With her pair, however, she wanted the sole to be black. No problem. After dyeing, I cleaned the pieces with Lexol and treated them with carnauba creme (wax). Since I was going to be gluing the straps to the soles, I didn't treat the whole pieces with the wax. I used the tape to show where I didn't need wax.


Fitting her shoes took repeated efforts, since I had to align the toe straps with the conchos and the riveting and make it fit around her foot properly. I did a fair amount of skiving on both the soles and the strap ends for her shoes so she wouldn't have huge lumps where the double layer of straps went under her (lack of) arch (I marked the skived areas with chalk in the picture below). I didn't bother with padding.


For my first pair I had used nails to reinforce the connections between the straps and the soles after I had glued them with Tandy's contact cement. For this new pair, I used rivets and cement. I also skived the straps, shaving off some of the blue and green dyed layers, so they wouldn't have such noticeable edges under the foot.


Next, I glued on the sole, avoiding putting cement on the back strap, which is supposed to slide.


For this pair of sandals, I wanted to try stitching around the edges of the sandals instead of nailing on the sole. The stitching gives a neater, more finished look to the sandals. The first step is to mark a dotted line of dents using an overstitcher that gives 5 stitches per inch.


I then used a Number 51 drill bit (just smaller than 1/16th of an inch) to drill holes through the soles. I was using a hand-held corded drill. It took 40 minutes for me to drill all around the two child-sized sandals, and my hands and arms were aching by the time I finished. Unfortunately, it was hard to drill straight down through the soles, so the bottom line of holes (and the resulting stitch line) wavered quite a bit. I drilled right through the heels as well.


We used two-needle stitching (my daughters both did some). I found helpful information on this on the web, particularly on the Back Room Leather website. I used waxed nylon sewing awl thread from Tandy. The stitching took about three hours.


We tried various methods to smooth the edges of the sole. Here my younger daughter is using sandpaper wrapped around a small block of wood to sand the edges of her sandals. She is using a "lacing pony" to hold the sandal while she works. The sandpaper-around-wood worked, but it was very slow, and it didn't work on parts that curved inward (the arch area). I also used coarse sandpaper cylinders attached to a mandrel on my drill. That worked better.


Once the stitching and trimming steps were done, I dyed the edges black to match the inner sole.

I don't want the shoes to be slippery, and I want to protect the stitching from wear, so I put a layer of SoleTech 3.5 on both the heels and the main part of the soles.

I had learned my lesson from the first pair of sandals, so I cut the SoleTech pieces a bit large and then trimmed them off after gluing the pieces to the sandals.


Here are the finished sandals:


Here is the front view:


I think the horse head conchos were an inspired piece of design on my daughter's part. She gets comments all the time about how cool they are. I hope she doesn't outgrow them in a month, but if she does, I can always make her another pair!