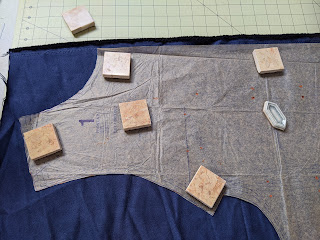
I needed "real" pattern weights. Staplers and scissors tend to be my go-to pattern weights because I keep them nearby, but they get kind of unwieldy for holding down bra patterns that have lots of individual little fiddly pieces.
FabMo, my favorite source for fabrics (except for bras!), also regularly gets donations of tiles from high-end bathroom design stores at the San Francisco Design Center. Many of these are plain (but handmade!) 4-inch or 6-inch square tiles and 2" by 4" subway tiles, but they often get other sizes and shapes, as well as mounted pattern examples that make great trivets. I recently found a square-foot sample of hand-cut marble pieces held together by fiberglass mesh and grout on the backs, as well as a few nice small shaped tiles. They would make great pattern weights!
I pulled apart the marble squares by hand, and pulled off as much of the mesh and grout as I could. It was only after doing that for an hour or so that I realized the mesh was fiberglass! Oops. Handling fiberglass with bare hands isn't a good idea, and I had lots of little fiberglass splinters in my hands to remind me. I did manage to get most of them out with Scotch tape or tweezers. I wore medical gloves for the rest of the time I was working with the fiberglass.
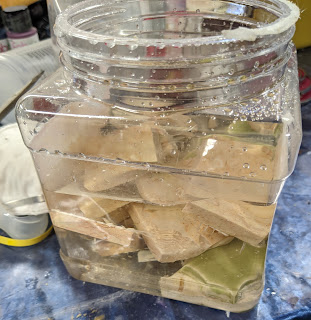
I found an article on the web that suggested using plain granulated sugar dissolved in water to help scrub the grout off tiles, so I put about a cup of sugar in two cups of water, stirred, and dumped in several of my marble tiles. It also suggested using a piece of wood to scrape off the grout to avoid scratching the tile.
Making the Pattern Weights
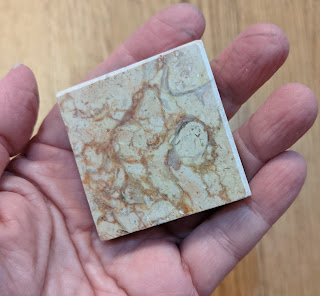
- Small tiles or pieces of marble or stone with a flat bottom, from 1 inch by 2 inches up to 2 inches by 4 inches (about 2.5 cm by 5 cm up to 5 cm by 10cm). Approximately 2 inches by 2 inches (about 5 cm by 5 cm) is ideal for most uses.
- Cork sheet, about 1/8 inch thick (2-5 mm thick). Available at craft stores, office supply stores, and stores such as Daiso. My roll of cork sheet came from Office Depot.
- Glue or adhesive. I used basic Elmer's white glue. Tacky glue will also work. Adhesive sheet or double-stick tape will also work, but I have found that those are more likely to come unstuck over time. The pattern weights do not need to be waterproof. If water gets on them while you are working with a pattern, your pattern would be more damaged than the pattern weight!
- Scissors, knife or rotary cutter and ruler for cutting the cork.
- Pen/pencil for marking the cork if needed. Do NOT use a marker to trace around the tile, not even a washable marker. The tile or marble sucks in the ink, and it's impossible to wash off! Yes, I found this out the hard way.
- Ruler
1. Trace around the tile or marble onto the cork.
2. Cut your pieces of cork slightly smaller than the tile so the cork does not show from the top of the pattern weight. Make to cork piece approximately 1/16th of an inch (1-2 mm) inside each edge of the tile.
3. Spread a small amount of glue onto one side of the cork and onto the bottom side of the tile. I spread the glue evenly with my finger on both pieces. You do not need much glue. If you have too much it will ooze out from the sides and make a mess.
4. Put the pieces together carefully and let dry. Clean off any excess glue if needed.
All done!

